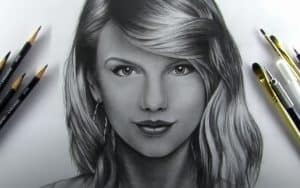
Please see the drawing tutorial in the video below
You can refer to the simple step-by-step drawing guide below
Step 1
Start by creating general contours of the head with the help of very light and simple shapes. Keeping in mind the rules of composition, place the top on the paper so that there is some free space between the borders of the head and the edges of the paper. Try to convey the proportions of the head to the paper as accurately as possible.
Step 2
Now, let’s draw a vertical line that will serve as a guide for us when describing all the features of the face, helping to make them most symmetrical and balanced. Draw an outline along the horizontal line of the eyes, this will help position the eyes on the face most accurately. Describe the nasal passages and mouth.
Step 3
Sketch the eyes, eyebrows, lips, ears and curls on the head with light and simple shapes. The details should be very general. When adding details, don’t focus on one side. Try to work on the entire drawing at once. For example, by drawing a line on the left eye, outline the same line on the right eye. Constantly compare facial parts to avoid errors in proportions and proportions.
Step 4
Continue adding parts of the face, gradually making them more detailed. Outline the lower eyelid and visible nostrils, and make the lips a little more detailed. Outline the contours of the cheeks and chin. Remember to depict the details on both sides of the face at the same time. Also, don’t forget to move away from the portrait from time to time so that the whole portrait can be seen.
Step 5
Now using sharper lines, carefully draw the eyebrows and eyes. Don’t forget that they have volume. The eye is a ball, and the eyelids have thickness. This must be conveyed in the drawing. Also, don’t forget about the creases around the eyes, which are essentially the contours of the eye sockets. We talked about this in our lesson on how to draw eyes in a three-quarter view.
Step 6
Draw the pupils, don’t forget to outline small round highlights in them. Next, go to the nose and give it more detail. When creating portraits, do not forget the rules of perspective from the air, and especially that the nose should be the darkest and most contrasting part of the face, since it is the part closest to us. In the lesson on how to draw a nose in a triad perspective, we talked about all of this in more detail.
Step 7
Now carefully draw the lips and chin. Following the aforementioned rules of aerial perspective, let’s make the contours of the lips closer to us darker than the contours farther away. In the lesson on how to draw lips in a triangle, we talked about this. To check the proportions of your sketch and to find possible errors in the proportions, you can look at it in the mirror.
Step 8
Now outline the contours of the curls. Do not draw each hair separately, try to create a general outline of the curls on the head. Then carefully delineate the details of the ear. According to the rules of aerial view, the ears should be lighter and less detailed than the rest of the face, since it is further away from them. We talked about all this and more in our tutorial on how to draw an ear.
Step 9
Now it’s time to give the portrait a more complete look. To do this, take an eraser and carefully erase all construction lines. Give your artwork more volume by making the near lines darker and more contrasting than those farther away. Compare your artwork with ours to find all errors and inaccuracies and correct them, if any.
Step 10
To make the portrait more rich and lively, you should add shadows. Start from the darkest areas, gradually working towards the lighter areas. Shadows must be depicted taking into account the shape and curves of the facial parts. That is, the hatch lines should follow the curves of the facial parts on which they rest. To learn more about shadows, their structure, and how to create them, read our article on light and shadow.
No Responses