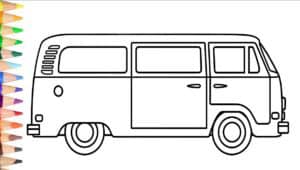
How to Draw a Van with this how-to video and step-by-step drawing instructions. I promise that you will enjoy this lesson and learn new and useful skills in the drawing process.

Please see the drawing tutorial in the video below
In this tutorial, I want to tell you how to draw a truck. This lesson can be used by any aspiring artist and child. This drawing tutorial has nine easy steps to help you draw this car.
I think you know that a truck is a vehicle. This vehicle can be used to transport various goods or passengers. It is very comfortable to use a van if you want to travel.
Prepare the drawing materials you need and get started with this easy drawing tutorial.
Material
- Pencil
- Paper
- Eraser
- coloring pages
Van Drawing Step by Step
Step 1. Visualize the main body of the truck.
To do this, you need to draw a figure using vertical, horizontal and oblique lines.
Step 2. Add window border.
Draw two horizontal lines, four vertical lines, and three ramps at the top of the truck.
Step 3. Sketch the valve head and gate.
At the top of the truck, draw a rectangle without a bottom and add a door.
Step 4. Draw the truck wheel.
To do this, draw two identical circles on the bottom of the truck.
Step 5. Describe the inside of the wheel.
To complete this step, add two identical circles inside the previously drawn circles.
Step 6. Add headlights.
Draw rectangles and ovals to draw headlights at the back and front of the van.
Step 7. Describe a few more elements.
Add a door handle, a mirror, and one more door using lines and ovals.
Step 8. Delete the auxiliary lines.
Use an eraser to erase unnecessary lines from the drawing.
Step 9. Color in the drawing.
For coloring, this truck uses black, gray, red and blue colors.
Good job! At this point, this car drawing lesson is over.
You can see more:


No Responses