How To Draw A Moth easy with this how-to video and step-by-step drawing instructions. Insect drawing tutorial for beginners and everyone.
Please see the drawing tutorial in the video below
You can refer to the simple step-by-step drawing guide below
Step 1
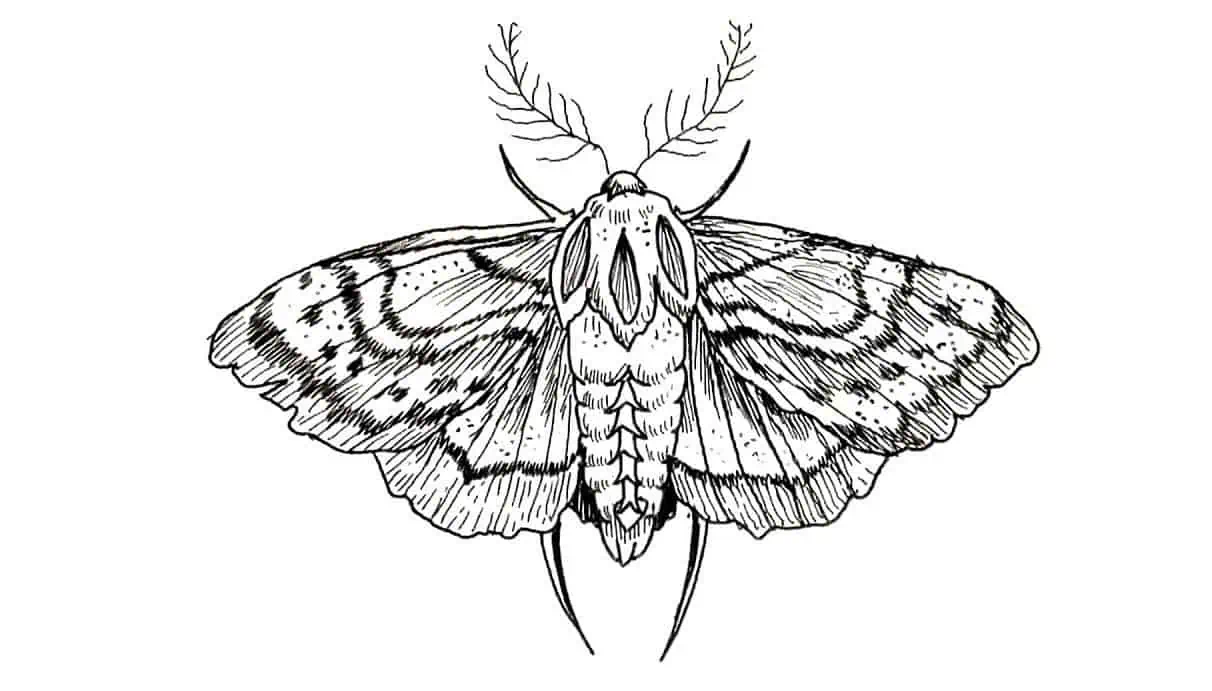
In the first step of our tutorial on how to draw a moth, we’ll start with its most striking feature: its wings.
They are the most noticeable feature because they have a beautiful pattern, but this can also make them the hardest part to draw.
First, you can start with the top right border of the wing. This will be drawn with some circles, as shown in the reference figure.
Once you have drawn the outline of the wings, we can start with the pattern for them. The pattern looks quite complicated and although it is quite complicated, drawing it is not as difficult as you think.
Just draw each part moving from left to right and be sure to use a reference image and refer back to it as you draw.
After you are satisfied with the look of the wings, we can move on to part 2!
Step 2 – Next, draw a mirror image for the next wing
You have drawn part of the wing so far, and for this part of your moth drawing we will draw the next part.
This will be easier for you, as you are simply copying an opposite version of the wing you just drew in part 1.
Everything has to be as close to that thing as possible to give the wings symmetry.
Even those who already have a lot of decorations for these wings, we will add more details about them later in the tutorial.
Step 3 – Draw the body and the rest of the wings
We’ll be drawing pretty much everything in this step of the how to draw a moth tutorial, so take it easy! You’ll want to start with the head and body of the moth in this section.
You can draw these aspects using some curves and circles to create the head and feel of the moth. Then draw some more curves for the different segments of the moth’s body.
Then you can draw the bottom half of the wing, which will be much smaller than the top half.
There will also be some details that you can reproduce for your drawing and again you should aim for symmetry between these wing segments.
Step 4 – Now, draw some more pattern details for the wings
Earlier in this moth drawing tutorial we covered adding some finer details to the wing patterns and we’ll start adding that now!
This step will finish using your pen to add some lines, patterns and other details to the top wing sections.
These intricate details can give a detailed and beautiful look to the wings, and will complete them in a unique way.
You’re almost done now and we’ll do the same for the bottom halves of the wings in the next step.
Step 5 – Finalize the final details of your moth drawing
This step of our tutorial on how to draw a moth will be about adding some final details to the wings.
We will focus on the lower halves in this section and our reference image will give you a great guide on how you can structure patterns.
You can also draw your own pattern details using the wing outline to create your own unique moth!
If you decide to go with this approach, there’s no wrong way to proceed! It’s generally better if both sides match, but otherwise there’s no rule and feel free to use whatever texture you like!
Step 6 – Finish your moth drawing with some colors
No moth is complete without some pretty colors for the wings, so we’ll add some color in your next moth drawing step!
In our reference image, we used a really warm palette with dark yellows, oranges and browns making up the bulk of the palette.
If you like the look, you can copy the colors we used, but you can also go wild with any other color you love to complete it.
You can also have some fun experimenting with different art tools and media like acrylic paints and watercolors.
Mixing paint mediums with other things like crayons and pencils can be a great way to mix up the look of a painting, but we know whatever you choose will look great!
Your Moth drawing is done!
That should end this step by step tutorial on how to draw a moth! Moths are incredibly beautiful in real life and we hope that this guide will make it easy and enjoyable for you to replicate your own variation of the moth.
Whenever you break a drawing into smaller steps, it always makes it easier for you, so that’s what we want to do for you in this tutorial.
Now you can take it to the next level by adding your own touches and variations!
These can include things like drawing backgrounds or even completely changing the details of the wing patterns. What else can you think of to complete this moth drawing?


