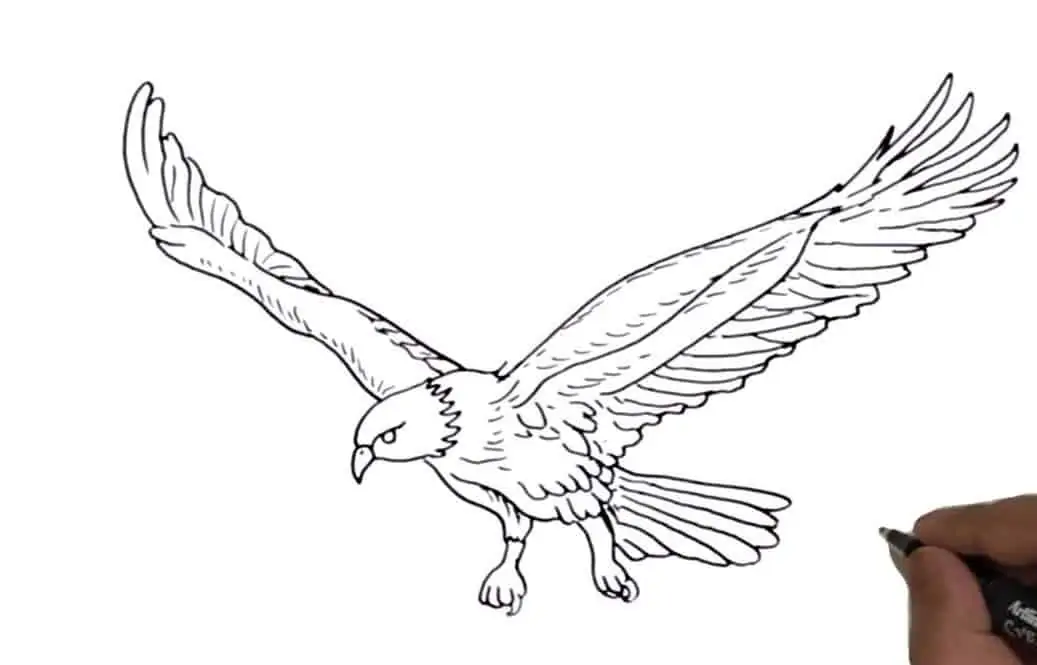
How to Draw a Mexican Eagle easy with this how-to video and step-by-step drawing instructions. Bird drawing for beginners and kids.
Please see the drawing tutorial in the video below
You can refer to the simple step-by-step drawing guide below
Step 1
Start making your Mexican eagle by drawing beak. This can be done by creating a small triangle with curved sides for the tip and an oval for the rest. Place a small circle near the head for the eyes as well while you are here.
Step 2
For the head, make a large curve that goes back to form the beak, into a slightly blurred line, curving down and around. This implies a change in coat color from head to body.
Step 3
For the body, simply create two curves that meet in a mid-slit afterwards, with a curve starting on either side of the head and meeting in the middle.
Step 4
The wings look complicated, but they can look amazing if you take the time. A long scan line can be used for the front. Try to think of each individual feather as two lines that meet in different shapes. For the hairs at the tips, the lines will meet sharply. As for the feathers close to the body, they should have a rounded tip.
Step 5
Now create the next wing, same as the last one. Remember, it’s just one long line for the front, and then two for each individual feather. Take your time and it will look good!
Step 6
Let’s make the feet by drawing four lines. The leftmost line will have a slightly rounded shape and will meet the adjacent line at one point. The other two lines will also meet at a small but insignificant point.
Step 7
Now draw the tail feathers. Just like wing feathers, each line is just two lines, connected at the end to form a circle. Take your time, and it will look great.