How to draw a Deer easy with this how-to video and step-by-step drawing instructions. Easy animals to draw for beginenrs and kids.
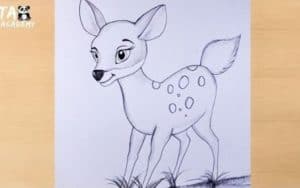
Please see the drawing tutorial in the video below
You can refer to the simple step-by-step drawing guide below
Step 1
Sometimes in life you have to start from the top instead of the bottom, and that holds true for our first step in how to draw a deer!
Deer have cute and pointed ears, and we’ll start with them for this step. To draw them in, you can simply use some curves with a point in them as they appear in the reference image.
Use a circle between them to form the top of the head.
Step 2 – Next, draw more head
For this step of drawing your deer, we will add the rest of the head outline below the ears. Carefully draw some more angled shapes to form the main outline of the head.
Then in front of the face you can draw in a more rounded shape as you can see in the reference image. We’ll be adding the deer’s snout to that more rounded area soon.
Step 3 – Now, start drawing the body
The head contour is complete, so for this third step we will start drawing the back of the deer.
This will be a curved line that extends down from below the ear and forms a curve back from the top.
Once you’ve got the back line like in the picture, add another curved line under the front of the face to start drawing your deer’s chest.
Step 4 – Add some more parts to the deer body
We are starting to build your unique deer drawing! For this step we will add more to the body of the deer.
Using the lines you drew for the back and chest of the deer, you can start drawing the legs.
The legs are thicker at the top and then become more angled as you go down. Reference images will help you a lot in getting in shape!
After you have drawn these legs, simply add a curved line between them to make the belly of your deer, and then lengthen the chest line down.
Step 5 – Now, draw the remaining legs and tail
You’ve already drawn with two pins, so it’s easier to add more pins in this step! Simply draw two more legs that look like the ones you drew earlier, just on the other side of the body.
Then use a curved line to create a small tail for your deer drawing.
Step 6 – Next, draw your deer’s face
The sketch for your deer drawing is now pretty much done! In this step of the how to draw a deer tutorial we will work on the deer’s face.
Deer eyes are quite small and they are located on either side of the face. Then you can draw the mouth with a curved line under the black and solid nose.
The nose and mouth will be in the round area of the face that you left before.
Finally, draw a line on the nose to make the muzzle for your deer, then draw two thin lines between the eyes to create the skeletal structure of the face.
Step 7 – Let’s add some final details to your deer
With the face drawn, your deer drawing is just a few more details and you’re ready for some color!
We added some details with some lines on the inner ear, belly, tail and legs to create some pattern variations.
There is also a line below the head for you to color later, and you can finally add some points to your deer.
These are the details we’ll be adding, but what other details do you think we’ll add?
Step 8 – Now finish your deer with some colors
That brings us to the final step of the deer tutorial!
Now that you have successfully drawn a cute deer, all that remains is to color it. The reference image we provide here shows you one of the many ways you can color this deer.
You can use more muted, brown colors to keep it looking a little more realistic, but you can also get creative with some fun and unique colors!
Once you get the colors right, you can have fun with some awesome art mediums! If I were coloring in this image, I would use some watercolor paint for a more translucent look.
I will also draw and color the beautiful forest background for this deer, but what medium do you think I will use? Will you draw in a background? We can’t wait to see how you complete it!
