How to Draw a Baseball easy with this how-to video and step-by-step drawing instructions. Easy drawing tutorial for beginners and everyone.
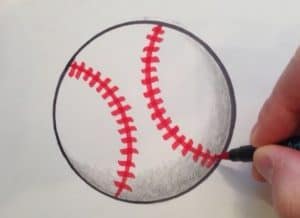
Please see the drawing tutorial in the video below
You can refer to the simple step-by-step drawing guide below
Step 1
Start by drawing a curved line down the top center of your paper. This forms the top half of a perfect circle.
To ensure that the baseball will be drawn centered, you can create reference lines by drawing an intersecting horizontal and vertical line on your paper.
The space just above the vertical line marks where you should draw the semicircle.
Step 2 – Create Baseball Shape Outline
Draw the bottom half of the circle just below the semicircle that we drew in the previous step. This forms a perfect full circle of the baseball.
If you need help drawing a perfect circle, you can check out our tutorial on how to draw a circle from our drawing tutorials category.
You can also use compass, which is a drawing tool that helps you draw a perfect circle quickly and easily.
Step 3 – Next, draw a curved line on the left side
Draw a curved line on the left side of the baseball. Remember that this curve should point to the left, as shown in the illustration.
This outlines the location where we will add the stitches later.
Step 4 – Draw a curved line on the opposite side
Repeat the previous step on the opposite side of the baseball.
At this point, the baseball will now have two curves pointing in opposite directions.
Step 5 – Draw the left half of the stitch
In this step, we will draw separate stitches on the surface of the baseball.
Continue filling in the stitches starting at the top of the curve on the left side. Draw two elongated ovals joined together to form a wide “V”. This creates a single stitch.
Continue repeating the same steps until the top half of the curve is filled with stitches, as shown in the illustration above.
Step 6 – Finish the stitch on the reverse side
Continue drawing the same patterns we drew in the previous step until the left curve is filled with stitches.
Having done this step, the stitch on the left side of the baseball is now complete.
Step 7 – Draw the right half stitch
Switch to the curve on the right side, drawing the same stitch pattern starting at the top.
Then work your way down until the top of the curve is fully stitched.
Step 8 – Finish the stitch on the right side
Repeat the previous step to complete the stitch pattern on the right curve of the baseball.
At this point, the stitching on both the left and right sides of the baseball is complete.
Step 9 – Now, magnify the stitch holes
After creating the stitches, we will now draw holes in the surface of the ball where the threads come and go.
A stitch consists of two diagonal lines connected together. On each end of a strand, draw a shading circle around the end of each strand.
This creates the thread holes of the stitches. This also adds an intricate detail to your drawing, making the baseball look more realistic!
Now that we’ve successfully drawn a baseball, it’s finally time for the most fun part — choosing and coloring your drawing!
As we all know, a baseball is white with red stitching. You can color the baseball with its original color or choose a unique set of colors. Either way, we’re sure the colors will turn out gorgeous!
