How to Draw A Cave easy with this how-to video and step-by-step drawing instructions. Pencil drawing tutorials for beginners and everyone.
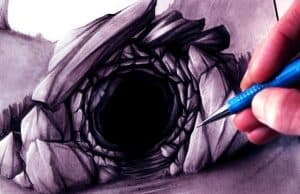
Please see the drawing tutorial in the video below
You can refer to the simple step-by-step drawing guide below
Step 1
In the first part of the tutorial on how to draw a cave, we will draw some of the rocks and boulders that make up part of one side of the cave.
First, we will draw a base on which the cave will rest by creating a slightly wavy horizontal line.
We will then use some circles to create the large stacked rock shapes on the left side of this line. After you have it like our reference image then you are ready to proceed to step 2!
Step 2 – Next, draw some more mouths of the cave
With the footstones drawn, we can now start drawing the mouth of the cave.
To do this, we will draw some more wavy and bumpy lines from the rock shapes you just drew in the first step.
You can then add some more circular shapes to the side of the cave’s mouth.
We’ll continue to draw the mouth in the next few steps, so let’s move on.
Step 3 – Now draw the top of the cave
In this cave drawing tutorial, we will draw the top of the cave mouth.
We’ll do this in a similar way to how you started drawing the mouth of the cave in the last step, but with a few differences.
Mainly, while the width of the mouth on the left side is quite thin, it will be slightly thicker at the top. Otherwise you will simply use some more bumpy lines for the crater.
Step 4 – Next, draw the right side of the cave
Your cave drawing is really taking shape! We will continue to talk more about the mouth of the cave in this fourth step.
We will continue the trend of the top of the cave as this right hand side will also be quite thick. You will again use the same bumpy lines that you used for this part.
Then, once you’ve drawn this side of the cave, we can finalize the details in the next section.
Step 5 – Now you can complete the final details of your cave drawing
In this fifth step of the tutorial on how to draw a cave, we will perfect the final details and elements.
You will also be able to add some details and additions of your own! However, before we do that, let’s wrap up the details first.
First, we will continue to make the outside mouth of the cave look nice and stone by adding some lines all the way through the inside of the cave outline.
Then we’ll draw some more curves into the hole of the cave to suggest that it has some depth. You can then draw some horizontal, jagged lines near the top of the cave to look like treetops in the background.
Finally, we’ll end up drawing some lines and rocks into the ground in front of the cave. That should wrap up the details in this tutorial, but you don’t have to stop there!
There are lots of cool things you can add to a drawing to help personalize it. One of the fun ways you can do this is to point out what you think might be contained in the cave.
It could be a bear or wild animal as we mentioned earlier, but you could also draw a scary troll or maybe some caveman! What fun ideas can you think of to add that would actually end this image?
Step 6 – Finish your cave drawing with some color
Now you have reached the sixth and final step of your cave drawing, and this is where we finish the drawing with some color. Here’s the part where you can really get creative with it and see what you can come up with.
We have shown you one way that you can use it in our reference image.
We used a nice wide color palette with blues for the sky, greens for the trees, browns for the caves and some dark yellows for the ground.
You can also choose these shades, but don’t be afraid to change it up and use your favorite colors!
You can also experiment with some cool art media, and you have a ton of color options and art tools that you can use.
I’m sure you’ll have fun and get creative with it, and we can’t wait to see how you color in this picture!
Your cave drawing is done!
Now you have successfully completed this tutorial on how to draw a cave! We hope that this tutorial has shown you that by breaking it down into steps, a drawing like this can become much easier and even more enjoyable.
Now you can show us your creativity by adding some extra details, elements and strokes to the picture. You can also really make this look great by experimenting with your favorite colors and art mediums.
