How to Draw Boxing Gloves easy with this how-to video and step-by-step drawing instructions. Easy drawing tutorial for beginners and kids.
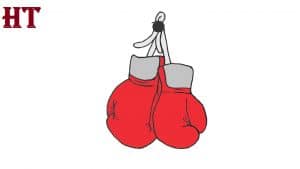
Please see the drawing tutorial in the video below
You can refer to the simple step-by-step drawing guide below
Step 1
Start by drawing an oval. This will help you outline the first glove.
Step 2
Use a curve to surround a rounded rectangle on top of the oval. This forms the wrist of the glove.
Step 3
Remove the oval from the wrist. Then, wrap around the wrist a rectangle.
Step 4
Erase one side of the oval. Use the curves that overlap to form the thumb and glove of the glove. Use short curves to model the star at the point where two lines intersect.
Step 5
Draw a second oval on top of the first glove. Delete as needed.
Step 6
Erase the upper part of the oval and outline the rectangle with rounded corners. It will overlap the glove first, so delete it as needed. This forms the wrist of the glove. Then, wrap another rectangle in the first image. Draw curves on the glove base to show the curvature of the material.
Step 7
Erase the side of the oval. Outline the thumb and glove using two overlapping curves. Use shorter curves to model a star where two lines meet. Then, draw a curve from the wrist to this junction, indicating an outline.
Step 8
Draw a circle above the glove. This will form a hook to hang the gloves. Draw a “U” shaped line above it. Below it, expand the two curves and fold them back over themselves. Then draw pairs of lines from the hook to each glove. This represents the string used to hang the gloves.
Step 9
See the glove details. Draw curves across the wrists and the side of the glove to indicate wrinkles and seams.
Step 10
Color your boxing gloves. They are usually red.


