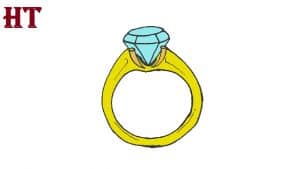
How to Draw a Diamond Ring Easy with this how-to video and step-by-step drawing instructions. Easy drawing tutorial for beginners and kids.

Please see the drawing tutorial in the video below
You can refer to the simple step-by-step drawing guide below
Step 1
Start off by drawing a circle. This outlines the outer edge of the ring strip.
Step 2
Draw another circle in the first circle. This outlines the inner edge of the ring strip.
Step 3
Draw a slight curve extending upwards from one side of the ring. Then, draw another line that extends upwards on the opposite diagonal. This forms the shoulder of the ring.
Step 4
Draw a curve through the inside of the end of the strip. This is called the bridge of the ring.
Step 5
Remove guide lines from the ring’s shoulder and bridge.
Step 6
Draw a small oval close to, but not connected, to each top line of the ring. From the edges of each oval, span two long curves. Allows lines to meet at a sharp point. Notice how the sharp shapes almost meet in the middle, forming a “U” shape. These are the prongs that will hold the diamond. Add texture to the prongs using the curves.
Step 7
Draw two lines overlapping the prongs. Notice that the diagonal lines meet at a sharp point. At the beginning of each line, draw a short line on the opposite diagonal. Then, connect these lines with a curve. This diamond, the center stone, together with the prongs form the top part of the ring. It is also known as a bezel. Connect shoulders with diamonds if needed.
Step 8
Remove the guide lines from the prongs so they appear to be in front of the diamond. Then, draw a large inverted triangle on the lower half of the diamond. Connect its corners to the faces of the rhombus. Then, draw two short lines pointing up from the corners. Connect them using a curve to surround a pointed oval.
Step 9
Attach the curved triangles to the rounded points on the shoulder of the ring. Then, draw a small circle below each triangle. These openings are called galleries. Finally, draw curves along the inner edge of the strap or the shank. These are called markers.
Step 10
Color your ring. Most rings are made of gold or silver.


