How To Draw A Lovebird easy with this how-to video and step-by-step drawing instructions. Bird drawing for beginners and everyone.
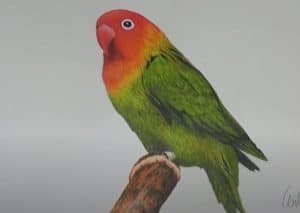
Please see the drawing tutorial in the video below
You can refer to the simple step-by-step drawing guide below
Step 1
In this first step, you need to draw three shapes, a circle for the head, a carrot for the wings, and a large egg for the body or chest of the lovebird. face, legs and thighs.
Step 2
Now what you will do here is start shaping the lovebird’s body using small serrated strokes to create a feather-like line around the body. Do this move around your body until the wind stops. This is where you will draw the lines to create the feather tip. Use this technique with the tail and draw shapes for the feet and legs.
Step 3
Now here in this step you will outline the details and definitions for the lovebird. Start by drawing a small circle for the eyes and then shape the beak with some detailed lines. Next, use more serrations on the lovebird’s chest to fill them with feathers and repeat the same operation on the wings. Once that’s done, you can detail the tail more and then start detailing the legs and claws on his/her paws.
Step 4
In this final drawing step, all you will do is detail the eyes by adding pupils and detailing the wings with some more jagged strokes to create the shape of a soft bird wing. You can now erase all the dirty guides and shapes that you drew in step one.
Step 5
That’s it you did it! It’s super easy duper isn’t it? That will complete this fun-filled tutorial on how to draw a lovebird with a peach face. I hope you had a great day and I’ll be back very, very shortly with the last tutorial of the day. Ta ta.


No Responses