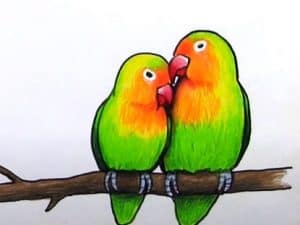
Lovebirds Drawing easy with this how-to video and step-by-step drawing instructions. How to draw a bird for beginners and kids.
Please see the drawing tutorial in the video below
You can refer to the simple step-by-step drawing guide below
Step 1
Start with four shapes, two for the head and then two for the body. Notice how the shapes are drawn close together.
Step 2
You will tackle this tutorial bird by bird. Start with the bird on the left by outlining the shape of the head and the claw shape of the beak.
Step 3
Now you will add an eye with a circle shape, and then fill the pupil with color. Next, draw the chubby cheeks, then finish drawing the beak by drawing a serrated line over the bird’s face. Next, move on to step four.
Step 4
You can start out sketching the lovebird on the right and as you can see the head blends in with the other bird because they are in love. Draw the eyes closed, and then follow the line of the beak and cheeks like that.
Step 5
Here you will start sketching the body starting with the back line and wings. When done, draw the chest and belly like that, then move on to step six.
Step 6
Okay, let’s sketch the lovebird’s body with only the thighs because the wings are hidden behind the body.
Step 7
Look how far you’ve come. What you need to do now is outline their paws and fingernails, then draw the ends of the branch they are sitting on.
Step 8
Add more branches and notice how I made the branches look wavy and full of personality. Next, draw a beautiful flower on the branch and move on to step nine, which is also your final drawing step.
Step 9
Finally, outline the tails and add all the details to the feathers until you have a nicely drawn couple like you see here. Erase the lines and shapes that you drew in step one.
Step 10
Here’s what the couple looks like when you’re done. Now you can color them more interestingly using some shades of lime green and pink.
