How to Draw Faces by pencil for beginners with this how-to video and step-by-step drawing instructions. Pencil drawing tutorial for beginners and everyone.
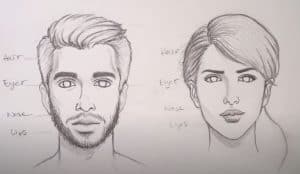
Please see the drawing tutorial in the video below
You can refer to the simple step-by-step drawing guide below
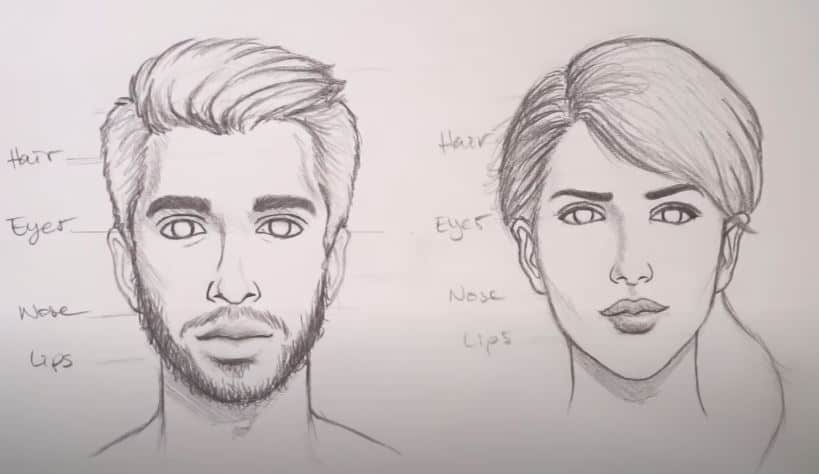
How to draw a male face easily
Step 1: Draw a circle
Draw a circle and then make a straight line through the center vertically and horizontally. Try to keep your construction line as light as possible. If you can draw a good circle, don’t worry! Trace a circular object such as a cup or tape.
Step 2: Draw a line for Chin
To figure out where to draw your chin, use a ruler or pencil and your finger to measure half the diameter of the circle (from the bottom of the circle to the horizontal line), then move your measurements down. same end of the circle and draw a straight line for the chin.
Step 3: Draw cheeks and jaw
Draw the cheeks and jaw by connecting the chin to the circle. Don’t forget to keep your stream light. We will make a clearer face later. The lighter your lines, the easier it is to delete and make changes.
Important: Before we move on to the next step, delete the horizontal line inside the circle.
Step 4: Draw a construction line on the face
Through the center of the head, draw a vertical and horizontal line.
Split the bottom of the face in half and then half again.
Do the same thing for the top of the face.
These lines are for the eyes, nose, lips and hair.
Step 5: Draw eyes and eyebrows
On the labeled eye line, divide the face into 5 equal parts. Make sure you count the width of the head.
Note: Thanks to Pranab Mahajan for reminding me to add this little detail – If you find it difficult to divide your face into 5 equal parts, measure the width of your head with a ruler and divide your number by 5.
Example: If the widest part of the head is 6cm, divide by 5 to get 1.2cm. Then divide the head into parts 1.2cm.
Draw your eyes in the appropriate space. Click here for detailed instructions on eye drawing.
Step 6: Draw the nose
Before we draw the nose, we will need some borders. Draw a line from the corner of each eye and stop at the line labeled nose.
Let the nose draw the nose in these boundaries. For a medium long nose, draw it on the nose line.
Learn how to draw noses: blog version, video version
Step 7: Draw the lips
We also need some lip lines. Draw a line down from the center of each eye and stop at the line labeled Lip.
Draw a triangle directly below (touch) the nose and end on the lip contour.
Learn how to draw lips using my triangle method: the blog version, the video version
Step 8: Draw the hair
Draw hairline by creating a well-defined angular shape.
I like to draw the top hairline between these two lines.
Once done, draw the rest of the hair. In order for his hair to have a larger volume, draw your contour away from the head, but make sure the distance is somewhat appropriate otherwise the head shape may not look realistic.
Step 9: Draw the Ears
Between eyes and nose, draw ears.
Step 10: Complete his face
Give cheeks, jaw and chin some more definitions. I gave him a sharp lower jaw with the dimpled chin. To make someone look thinner, you can draw some subtle lines to shape the cheek.
Finally, give him a thick neck and add shoulders.
I removed the construction lines to show you his face without objection. You can keep these construction lines to support you at the end of this tutorial as we exchange facial features to transform our characters!
How to draw female faces easily
Step 1: Draw a circle
Same thing here – draw a circle with a line going through the center vertically and horizontally.
Step 2: Find out where to draw the chin
Measure half the diameter of the circle and add it to the bottom to get the chin, except THIS time, draw the chin a little shorter.
Step 3: Draw cheeks, jaws and chin
For women, I like to draw narrow faces with narrow jaws. For the chin, tuck your lines inward so that the chin is narrower than the male.
Step 4: Draw a construction line on the face
Delete the horizontal line inside the circle and then draw a line going through the center of the head vertically and horizontally.
Split the bottom of the face in half and then half again.
Do the same thing for the top of the head.
Step 5: Draw the eyes
A line with an eye tag, dividing the head into 5 equal parts while taking into account the entire width of the head.
Draw your eyes in the 2nd and 4th space.
How to draw a realistic eye
Step 6: Draw the nose
Again, draw a set of boundaries going down from the inner corner of each eye. Draw your nose a little higher than your nose ‘nose for a moderately long nose.
For a more feminine face, draw a narrow nose with soft lines that are not too angular / sharp. For the bridge of the nose, draw a smooth curve that is not too dark.
Step 7: Draw the mouth
Create your borders going down from the center of each eye.
Draw your triangle just below the number

