How To Draw A American Flag easy with this how-to video and step-by-step drawing instructions. Drawing lessons tutorial for beginners and kids.
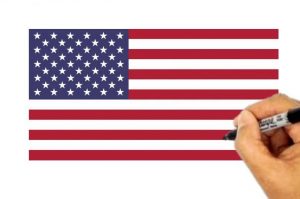
Please see the drawing tutorial in the video below
You can refer to the simple step-by-step drawing guide below
Step 1. Draw the Shape of the Flag

For the first step in our US flag drawing tutorial, you will need a ruler to help you draw!
Use your ruler to draw a rectangle for the flag. Notice that the flag is 2/3 as wide as it is long.
That’s all we need for this step, so let’s move on to step 2!
Step 2. Now Draw a Rectangle Inside the Flag

The stars of the fifty states are an iconic feature of the flag, and we will be drawing a rectangle containing them in this step of our how to draw the US flag tutorial.
To do this, simply use your ruler to draw a rectangle in the upper left corner of the flag as shown in our reference image.
Step 3. Add the Flag’s Stripes in This Step
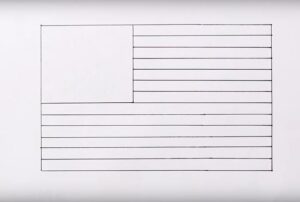
The next step to drawing your US flag may look simple because you’re just drawing some straight lines, but it can be more complicated than it looks!
The reason for this is that if you want the flag to be accurate, you will want to make sure that you have 13 stripes on the flag.
If you keep your stripes evenly spaced, you can easily run out of space or have too much space at the end!
You can avoid this problem in two ways. You can first draw the lines with a pencil and then with a pen when you get the spacing right.
Alternatively, you can leave the bottom edge of the flag as is and then draw in when the stripes are accurate. Whichever way you do it, you will be ready for the final steps in no time!
Step 4. Now You Can Add the Stars of the Flag
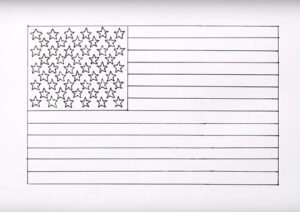
Before you add the classic American flag colors to your drawing, we have one more important step in this tutorial on how to draw an American flag.
The flag is sometimes called the stars and stripes, and since you have drawn the stripes, it is time to add the stars!
The flag is also sometimes called the stars and stripes, and since you have drawn the stripes, it is time to add the stars!
We mentioned earlier that there are fifty stars on the flag representing the fifty states, so we’ll draw them in this step.
There’s a bit of a pattern you can follow here, as you can draw a row of five stars vertically, then continue with the next four stars.
Continue this pattern until you have all fifty stars! This is a step that may require a little patience as you draw each star, but it will be worth it!
Just like the stripes you drew earlier, you can first use a pencil until you get the spacing between the stars exactly as you want. You can then re-draw this pencil to finish.
Before moving on to the final step, be sure to add any details you want! Some ideas might include a background to display the type of day in the background.
You could also draw a flagpole for this flag to fly! What details will you add before you color your flag?
Step 5. Finishing Up Your American Flag Drawing With Some Color
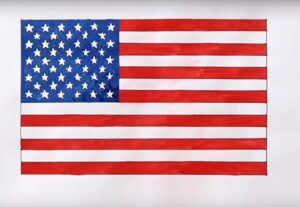
Now that your flag is done, there’s just one more step to finishing your American flag drawing!
The flag is famous for its red, white, and blue color scheme, so that’s what we’ve included in our reference image.
To add some character to our drawing, we’ve also colored the stars in a light yellow. You can also leave them white if you prefer!
You can then use your favorite blue and red for the rest of the flag. For the stripes, you’ll alternate between red and white, and you’ll end up with red as the color for the first and last stripes.
When coloring a drawing with smaller details like this, you can use art mediums that allow for precision to make your life easier.
Some examples of mediums you can use are colored pencils, markers, or colored pencils. If you want to use paint, use a fine tip brush if possible.
What colors and art mediums will you use to complete this image?
You can see more flag drawings:


