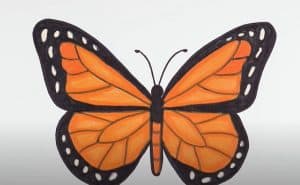
Monarch Butterfly Drawing by pencil with this how-to video and step-by-step drawing instructions. How to draw a Butterfly for beginers and everyone.

Please see the drawing tutorial in the video below
You can refer to the simple step-by-step drawing guide below
Step 1
First, draw the body. The butterfly body is long and narrow.
Step 2
Next are the right flanks. Draw a large triangle for the top wing and a circle for the lower wing.
Step 3
Next, draw the left wings. Monarchs have an average wingspan of 4 to 5 inches.
Step 4
Now start drawing details on the upper right wing. Draw large shapes together.
Step 5
Then draw the details of the upper left wing. These details should be the same as the first details you drew.
Step 6
Add some more details to the top right wing, with the smaller shapes in the corner.
Step 7
Draw the same details on the upper left wing.
Step 8
Now start drawing details on the lower right wing, they look like large cubes lying close together.
Step 9
Reflect the same details on the lower left wing.
Step 10
Finish off the details on the lower right wing by drawing many small shapes around the edges.
Step 11
Draw the same details on the lower left wing. This will complete the butterfly’s beautiful and elaborate wings.
Step 12
For your final step, draw the butterfly’s antenna. Now you can think about coloring your drawing. Monarch butterflies are very bright and colorful, so use your imagination!


