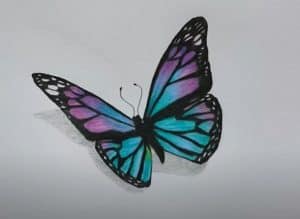
Realistic Butterfly Drawing by Pencil with this how-to video and step-by-step drawing instructions. How to draw a Butterfly for beginners and everyone.
Please see the drawing tutorial in the video below
You can refer to the simple step-by-step drawing guide below
Step 1
To start drawing our butterfly, you will need to draw a thin oval that will become the body of your butterfly. This oval also needs to be divided into three parts: the smallest at the top, the middle a bit longer, and the bottom being the longest. These sections will become your butterfly’s head, abdomen and chest.
Step 2
Next we’ll expand the three parts we outlined in step 1. Using the principles, expand your butterfly body into three separate parts as shown in the image on the right.
Step 3
Now that you’ve drawn the butterfly’s head and body, you can start adding wings. For this butterfly, you will need to draw a large shape that somewhat resembles a guitar. This part of the wing is as wide as the length of the body.
Step 4
Below the first part of the wing you drew, you will now need to draw the same part to complete the wing. The bottom part of the wing is slightly smaller and more rounded than the top. Make your drawing fit the right image.
Step 5
The next step in drawing your butterfly is basically repeating the last step. Using the same pattern from the last step, draw the same wings on the other side of your butterfly body. For this particular butterfly, the left wing is just slightly tilted up. To get this look, let’s draw the left wing half the width of the right wing.
The last two steps to drawing a butterfly are also the most fun! This is where you can let your imagination soar and where a butterfly really comes to life.
Styep 6
In this step you can model the butterfly’s wings. As you can see in the example on the right, I chose a simple template that looks pretty realistic. By adding a few horizontal lines on the wings and some curved stripes, you can create a pretty realistic butterfly wing. On the other hand, you can also draw non-natural patterns to give your butterfly a magical look. The choice is yours!
Step 7
Here you can view my finished butterfly drawing. All that is needed for the final step is to simply add the wing patterns to the other three parts of the butterfly wings, while also shading the uncle’s body and antenna.
If you’ve followed all of these steps, pamper yourself. You should have a gorgeous butterfly that you can be proud of!
