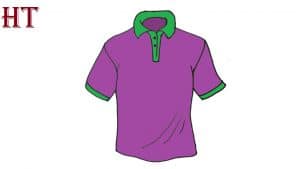
Shirt Drawing easy with this how-to video and step-by-step drawing instructions. Easy drawing Tutorial for beginners and kids.

Please see the drawing tutorial in the video below
You can refer to the simple step-by-step drawing guide below
Step 1
Start by drawing a curved triangle, leaving one point unjoined. Then draw a short line from the bottom edge of the triangle. This forms one side of the shirt collar.
Step 2
Next, draw a second wavy triangle, again leaving one corner unjoined. This should be a close mirror image of the first side, forming the opposite side of the collar.
Step 3
Connect the open ends of one triangle to the open ends of the other using curved lines. This completes the neckline. Then draw a pair of descending lines from the front of the collar. Join the lines at the bottom with a short line. This part of the shirt is called the placket.
Step 4
Draw a line down the center of the racquet to indicate the opening. Draw small circles next to the line to indicate the buttons.
Step 5
Extend a long, curved line from one side of the collar, outlining the body of the shirt. Notice how the squared line where the shoulder will soon meet the sleeve.
Step 6
Using curved lines, outline the other side of the shirt body, forming a mirror image of the first shirt.
Step 7
Connect the lines using a curved line, forming the bottom hem of the shirt. Draw diagonal curves near the bottom of the shirt, indicating ripples in the fabric.
Step 8
Draw sleeves. Use a curved line around each sleeve. Start at the shoulder and trim the corners of each sleeve.
Step 9
Draw a curved line parallel to the end of each sleeve, forming the cuff.
Step 10
Color your polo shirt. Make it match your favorite outfit or color it to represent your favorite sports team. Be creative, because the choice is yours.


No Responses