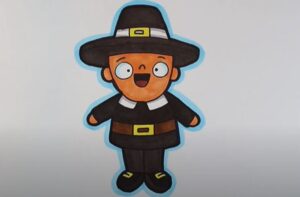
How to draw a Pilgrim with this how-to video and step by step drawing instructions. Perfect for a Thanksgiving drawing activity, this easy Pilgrim tutorial is perfect for younger students looking to stay creative throughout the Autumn holiday season.

Please see Pilgrim drawing tutorial in the video below
You can refer to Pilgrim simple step by step drawing guide below
Step 1. Shape the head
First, draw two circles to form the eyes. Next, draw a downward line for the nose. Now, add a smile by drawing a curved line on top. Then, outline the head by drawing a U-shaped line. Don’t forget to draw ears on each side of the head!
Step 2. Draw the hat
Sketch the shape of the hat similar to the illustration. Add a band on the hat by drawing two curved horizontal lines. Next, draw a buckle on the strap by creating four vertical lines.
Step 3. Attach the body
First, sketch the shape of the collar connecting to the lower part of the head. Next, draw the Pilgrim’s torso as shown.
Step 4. Add belt
Add a belt by drawing two long horizontal lines. Next, create the buckle shape of the belt by drawing four vertical lines.
Step 5. Attach the arms
Attach the arms by drawing a long diagonal line on either side of the torso. Add cuffs by drawing a rectangle at the end of each arm.
Step 6. Shape the hand
Create a circular outline of the Pilgrim’s hand. Then, draw the outline of the fingers as shown.
Step 7. Draw the pants
Draw two long rectangles to form the Pilgrim’s pants.
Step 8. Sketch the shoes
Sketch the elongated shape of the Pilgrim’s shoes as shown in the image.
Step 9. Complete the pilgrim drawing
Let’s complete the Pilgrim drawing by adding a little color! First, use a peach color to shade the Pilgrim’s head and hands. Next, color in the eyes and shoes with a black pencil. Now, use a white pen to color the collar and cuffs. Then, fill in the belt and hat band with black and yellow pencils. Finally, color in the rest of the Pilgrim’s hat and clothing with a brown pencil.


