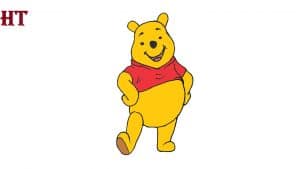
How to draw Winnie the pooh easy with this how-to video and step-by-step drawing instructions. Cartoon drawings for beginners and kids.

Please see the drawing tutorial in the video below
You can refer to the simple step-by-step drawing guide below
Step 1
Start off by drawing a circle. This will form the top of Pooh’s head.
Step 2
Extend a curve from one side of the circle, bending it in an irregular way to meet the opposite side of the circle. This will help you shape Pooh’s face.
Step 3
Next, stretch a long, curved line below the head and fold in half to embrace the stout body.
Step 4
Draw Pooh’s legs. For each leg, start with a pair of curves. To form the foot, allow one curve around and touch the bottom of the other, bending through it to shape the upper part of the foot.
Step 5
Remove the guides from Pooh’s face and feet.
Step 6
Next up, crafting Pooh’s classic shirt. Draw a pair of curves to form the neck, meeting at a point in the middle. Use the curves to surround the collar and additional curves to form the sleeves. Finally, use a long, curved line to cover the bottom of the shirt.
Step 7
Remove any guides from the shirt.
Step 8
The shirt details with the texture of the fabric folded using short, curved lines. Then draw Pooh’s arm using a series of curves.
Step 9
Twist each ear using a short, curved line to create an irregular circle. In the center of the face, draw a rounded, upside down triangle and shade inside it to form the nose. Place a curve above the nose to indicate wrinkles. On each side of the nose, draw a short, curved line to denote the wrinkles of the eyes. Shade a small circle on each line. Draw curves for the eyebrows. Start the mouth using a large “U” shaped line. Draw short curves at each end and use a curve around the lower opening. In the mouth, draw a curve to represent the tongue.
Step 10
Coloring Winnie the Pooh. He is usually golden yellow with a red shirt. Give him a house in the Hundred Model Forest using our jungle painting tutorial.


