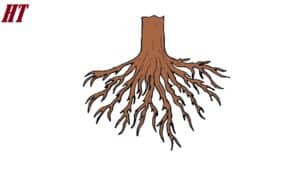
How to Draw Tree Roots with this how-to video and step-by-step drawing instructions. You can easily cope with this creative task.

Please see Tree Roots drawing tutorial in the video below
If you want to learn how to draw individual parts of a tree, then this lesson will be very useful to you, because now you will learn how to draw roots. Roots are the underground part of plants, but in some plants, roots can be above ground. Roots have similar functions, but different structures.
In the figure, you see a well-developed main root, from which the secondary and secondary roots arise. The main root is wide and upright, while the accessory roots are thinner.
Freehand lines are allowed in this tutorial, so the shape and size of the roots in your drawing may differ from my example. The main thing is to remember the sequence of steps so that you can easily draw the roots if needed.
Roots Drawing Step by Step
Step 1. Draw the vertex of the origin.
Draw two vertical lines parallel to each other.
Step 2. Add the roots above.
Continue the lines and add the long side roots and two small roots at the top.
Step 3. Outline the bottom part of the root.
Continue the line and draw a long, curved vertical origin.
Step 4. Describe the lateral roots.
On the right side, add a long side root and two more small roots.
Step 5. Add roots to the bottom of the root system.
Repeat the previous step and add a few different shaped roots.
Step 6. Outline the roots to the sides.
On each side, add a few small roots.
Step 7. Draw the rest of the roots.
Finally, add the smallest random roots using short curves.
Step 8. Detail the surface of the tooth root.
Use short, thin strokes to detail the surface of the roots.
Step 9. Color the roots.
For coloring, use any shade of brown.


