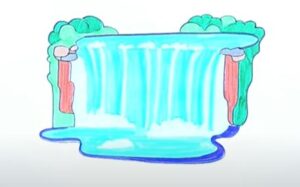
How to Draw Niagara Falls with this how-to video and step by step drawing instructions. There are 6 simple steps to follow along with. kids will enjoy making their own Niagara Falls drawing on paper. Also included is a printable version of this niagara falls drawing tutorial (near bottom of lesson).
Please see Niagara Falls drawing tutorial in the video below
You can refer to Niagara Falls simple step by step drawing guide below
Step 1. First create a waterfall shape
Draw a wavy line to form the top of the waterfall. Then, attach a curved vertical line to form the edge of the waterfall.
Step 2. Add fog
Add the mist that forms at the base of the falls by drawing a bumpy shape.
Step 3. Now form the rocks
Draw the rocks on each side of the waterfall by creating a jagged line.
Step 4. Draw the foliage
Now add some foliage by drawing bumpy shapes on top of the rocks. Next, draw more detailed foliage in the foreground by creating outlines of the leaves and bushes similar to the illustration.
Step 5. Add texture to the water surface
Draw short wavy lines to add some texture to the water’s surface.
Step 6. Complete the Niagara Falls drawing
Let’s add some color to our drawing of Niagara Falls! First, fill the water with a brilliant blue pencil. Next, color in the fog with a white pencil. Now, shade the rocks with a brown pencil. Then, color the foliage with shades of green. Finally, shade the sky with a light blue pencil.
