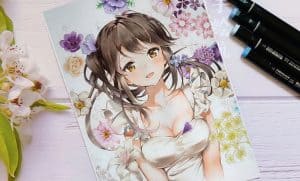
How To Draw Manga Girl Style with this how-to video and step-by-step drawing instructions. Manga drawing tutorial for beginners and All.
Please see the drawing tutorial in the video below
You can refer to the simple step-by-step drawing guide below
Step 1
The first step is to identify the top. The human body is divided into 3 parts: head, torso and legs. In the manga style, his head is bigger, like his eyes (this is the most important part of this style). Draw a big circle, mark the height of the eyes and we can define the jawline, the height of the nose, mouth and ears.
Step 2
To define the body, we’ll do the hips. We can see that the key points of the joint include the neck and hips, which allow the vision and body shape to be determined. Once the torso has been defined, the arms do the following: shoulder, elbow, wrist, and hand. Manga style, slim arms and delicate hands.
Step 3
Just define from hip to foot, done from groin, to knee, ankle and finally foot. In this case, only to the knees. The legs are too thin and the appearance is fragile.
Step 4
Now start the step definition. We start with the face. The eyes should be big and round, but don’t define the form completely, because then we’ll be using color. The nose is a small, almost imperceptible spot. The mouth isn’t really about the axis of symmetry on the face, but in manga it’s often a “small scale” and “wrong look” to get other types of effects, here and there, depending on the type. The strokes should be rounded and clean.
Step 5
To draw the hair, let’s start with the fringe. We’re going to make some yarns, and as we move away from the head, the yarns won’t be as defined, because then it’ll follow the color. The long hairs acquire great dynamism and movement.
Step 6
Actually this step is not necessary. The “nekogirls” are very popular in the sleeve and give more sweetness and innocence. It’s easy, just define the ear and the tip of the tail, so taking into account the starting place, having marked this point, we can come up with the way we want.
Step 7
Time to make clothes. Everyone can make it to your liking. Remember that clothing is closer to the body, has fewer folds, and looser, more pleated. Also remember that the direction of the folds depends on the position of the body. There are no special tricks.
Step 8
Once we have defined our body, it’s time to clean up the contours. Using what program? I personally recommend PAINT TOOL SAI, which is a popular program used by mangakas for their artbooks. The outline of this program is more intuitive and the lines are clearer, you can also use A. Photoshop, I leave you to choose.
Step 9
Coloring is usually done with small hard shadows and gradients, which will create the base color and then define the shadows, depending on the direction of the light. The most important feature is the manga style eyes. The first is to rely on a base color and create pupils and shadows. As a second step, we will create a gradient on top of a darker shade to create volume. The third step is brightness. Usually there is a larger one at the top and a smaller one at the bottom, this depends on the direction of the light, in this case from the left, so the brightness will be in this direction. And so we get our own figure drawing in manga style.
