How to Draw Big Ben easy with this how-to video and step-by-step drawing instructions. Pencil drawing tutorials for beginners and All.
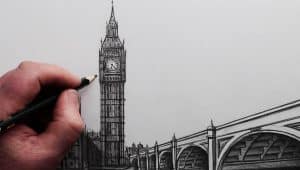
Please see the drawing tutorial in the video below
You can refer to the simple step-by-step drawing guide below
Step 1
You might think that drawing such an iconic and detailed landmark would be a daunting challenge to do, but we’ll make it much easier by breaking it down into a number of small steps. than!
For the first few steps of this Big Ben tutorial, we’ll be working with some simple shapes. Now we will work on the lower parts of the structure.
We’re going to use some lines to create two squares that have some thick borders on the top edges. Reference images will guide you how they should look.
The top should also be a bit smaller than the bottom! Then, once they’re drawn, you’re ready for the second step!
Step 2 – Next, draw the next part of the building
You started this drawing of Big Ben with two squared parts, so you should have no problem adding another to the image in this second step!
To do this, you simply add another squared part on top of the first two. This will be the same width as the previous one and it will have the same rims on the top sides.
With the third part drawn, you can then continue to step 3 of the tutorial.
Step 3 – Now draw one more part of the building
There’s only one squared part left to draw before we start adding some more complex elements to the image.
This one will also be the same width as the previous two, but there will be a difference in this latest installment.
The difference will be that the contours on the top edges will be joined by a horizontal line.
That’s because this square section will be the last before the pitched roof of the tower that we’ll start with in the next step.
Step 4 – Next, draw the top of the tower
As mentioned in the previous step of this Big Ben drawing, in this part you will see the beginning of the roof of the tower.
This section will have some thin longitudinal sections for the bottom of the roof, and then there will be a flatter triangular section above it.
Then add a small rectangular section with two lines forming a pointed end.
Reference images will guide you as you draw if any of these sound confusing!
Step 5 – Now let’s start drawing some smaller details
The main outline of this tower is done, so from this step of the Big Ben tutorial we will focus on some of the smaller details.
First, draw a circle near the upper parts of the tower for the clock face. We’ll be adding some more details to it soon.
Then use some small squares and lines to connect the different rims you drew on the top of each square section.
Finally, draw some small and thin vertical shapes near the top for some peaks on the top of the tower.
Step 6 – Next, draw some small details
Continuing with this drawing of Big Ben, we can now add finer details to the image.
First, draw another circle inside the watch face, then add some lines on the edge of the watch face. You can also draw the thick hands of the watch.
Then add some vertical lines down the inside edges of each square. You can finish this step by adding some thin spikes near the base of the clock tower.
Step 7 – Complete the final details
This step in our Big Ben tutorial may look complicated, but it’s not as bad as it looks! For this step, you will draw some thick line details inside each part of the tower.
This is a step where you will really benefit from closely copying the reference image we have provided.
Once all the details are added, you can also provide some of your own.
These could include some weather effects or even some of London’s more famous landmarks! How will you end it?
Step 8 – Now finish it with some color
The final part of this Big Ben drawing is finished with some color. In our example image, we used some actual colors and shades to color it.
These include some lighter browns and darker greens, and you can choose similar colors in your own images!
Would you opt for a dimmer look or maybe some brighter colors for a more expressive, stylistic approach? We can’t wait to see what you choose!
Your Big Ben drawing is done!
Go to the end of this Big Ben how-to tutorial! We hope that the steps in this tutorial will help you recreate this iconic tower in a fun and easy way.
Now that you’ve mastered the steps in this tutorial, you can move on by adding your own great details and ideas!
We covered a few ideas earlier in the tutorial, but what else can you think of?
Once you’ve finished this tutorial and are ready for more, you can find the next one on our website! Be sure to keep visiting us as we regularly upload new guides.
