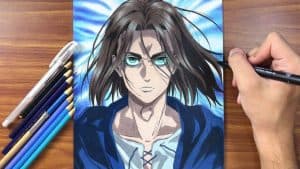
How to Draw Eren Yeager From Attack on Titan with this how-to video and step-by-step drawing instructions. Cartoon drawings for beginners and All.

Please see the drawing tutorial in the video below
You can refer to the simple step-by-step drawing guide below
Step 1
Create some basic guide shapes for such a head and torso. Sketch out the facial guidelines as well as the neck and body guidelines.
Step 2
Instead of drawing Eren’s face in this second step, we’ll outline most of his hairstyle or the shape of his head. As you can see, his bangs are parted instead of straight across his forehead like many other anime characters.
Step 3
Now we can process the face by sketching the face shape. Then you’ll draw Eren’s eyes, eyebrows, then nose and mouth. Finish this step by drawing his neck and lots of hair.
Step 4
This is where we will outline his body in the form of a jacket. Start with the collar of the jacket, then draw at the shoulders and then the length of the jacket. You’ll also add jacket flaps, then shoulder details.
Step 5
Continue with the jacket drawing by sketching the sleeves. Add creases and folds to the sleeves, then draw pockets and patches. Don’t forget to add striped detail on the bag.
Step 6
This is the step where you will finish drawing Eren Yeager. Draw a collar line for his shirt, then add folds and folds on the sides of the shirt near his waist. Draw the waist and hips, and finish things off by adding the rest of the details. Erase your mistakes and you’re done.
Step 7
This is line art for Eren Yeager. Now you can color him.


