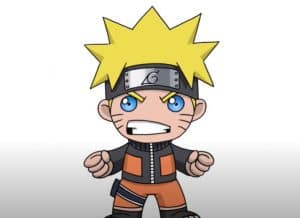
How to Draw Chibi Naruto easy with this how-to video and step-by-step drawing instructions. How to draw cartoons for beginnrs and kids.

Please see the drawing tutorial in the video below
You can refer to the simple step-by-step drawing guide below
Step 1
The first thing you need to know is that the proportions of chibi characters are very different from the ratios of regular anime characters. So we’re outlining Naruto’s round head like in our example. Next, draw two lines that intersect the face.
Step 2
Now with the help of very light contours, outline a small body and small limbs. Note that the chibi’s body is about the same height as the head. Don’t forget that we have to use very light lines in the first steps.
Step 3
Now, let’s use these very bright lines to outline the famous angled hairstyle, the contour of the headband and the details of the face. On the body, outline the contours of the clothing, as in our example.
Step 4
Time to work on the final details. Using clear and dark lines, carefully draw big eyes with glare inside them. Next, draw the contours of the face, mouth, and contours on the cheeks.
Step 5
Now let’s finish drawing the details on top of Naruto chibi. With the help of clear and dark lines draw out the contours of the hair, bandages on the forehead and patterns in the center of the bandage.
Step 6
Now let’s move on to Naruto’s chibi body. Carefully draw the outlines of the clothes, as in our example. Note that the lines must be clear and dark. Remove all unnecessary guidelines from our chibi drawings.
We really hope that this lesson was helpful and enjoyable to you. We have been working hard to make this lesson easier to understand and understand, so that all our readers can cope and create a great Naruto chibi drawing. If you want to learn how to draw other characters in anime and manga in chibi style, please visit the category “Anime” on our website. We are also waiting for you in our social networks, where we publish surveys and inform about our future lessons.


