How to Draw Chibi Natsu easy with this how-to video and step-by-step drawing instructions. Easy drawing tutorial for beginners and kids.
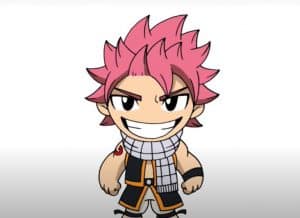
Please see the drawing tutorial in the video below
You can refer to the simple step-by-step drawing guide below
Step 1
Traditionally we start with the head of the chibi character, outlining it in the form of such a circle. On the surface of the head, outline two intersecting lines.
Step 2
Now we are sketching a very small torso and very small arms and legs. Note that the chibi body is the same height as the head.
Step 3
On the top outline the hair, outline the eyes, ears and mouth. Next, outline the outlines of the scarf. At the end of this step let’s outline the contours of the garment.
Step 4
This will be a fairly simple step in which we will need to draw the contours of the hair, as in our example.
Step 5
Now let’s go to our chibi’s face. Carefully draw the eyes, pupils, eyebrows, and mouth. In the same step, you draw a scarf and stripes on the towel.
Step 6
Now let’s move to the top part of the chibi body, drawing the outline of the arms and torso. Don’t forget to remove unnecessary instructions from the upper body.
Step 7
And the last step, which draw the contour of the leg and the clothes like in our example and removes all remaining unnecessary instructions.
As you can see, today’s drawing lessons are incredibly simple, as are all of our other drawing lessons from the chibi character series. If you want to learn the rest of the chibi characters, visit our category titled “Anime”. But if this lesson is too simple for you, then visit our other categories where you’ll find more difficult drawing lessons. Anyway, visit DrawingForAll as often as possible and subscribe to us on social networks.
