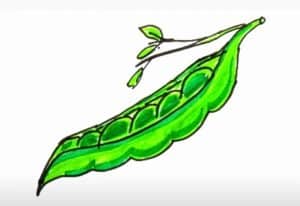
How to Draw Beans Easy with this how-to video and step-by-step drawing instructions. Vegetables Drawing Tutorial for beginners and eveyone.

Please see the drawing tutorial in the video below
You can refer to the simple step-by-step drawing guide below
Step 1
Start by drawing a long curve to outline one side of the pea pod. At one end, use curves and line pairs that meet at gentle points to form sepals and leaf-like stems.
Step 2
Use overlapping curves to draw ripples near the side of the pea pod. It will meet the previous curve at one point. Draw a series of curves down the center of the shell.
Step 3
Continue the middle lines to the calyx. Then start drawing a second pea pod partially hidden behind the first. Sketch the top of the case with a “U” shaped line and draw a curve down its center. Then, use the curves to cover the calyx and the stem.
Step 4
Use two wavy curves to draw the rest of the pea pod. Allows the lines to meet at a sharp point. Draw curves down the center of the shell.
Step 5
Start drawing the third bean. Use the pairs of curves to draw the stem and sepals. Then, use the overlapping curves to outline the bulge of the pea pod.
Step 6
Continue to draw the side of the pod and use overlapping curves to draw the opposite side. Allows the lines to meet at one point. Draw a downward curve in the middle of the pod; it will also end up at the pointy end.
Step 7
Stick the pea shapes into the pod using overlapping curves.
Step 8
Details of the bean tip have curves. Notice the shaded center of each line. Then draw some peas that have been removed from their pods.
Step 9
Use curves to outline more beans. Detail each bean with curves along the concave side. Again, notice the darker part of the line.
Step 10
Color your cartoon beans. The pods can be green, brown, yellow, and even red or purple. Beans too, there are many types. Some are black, white, green or brown. Others have bull-like spots or light streaks.


