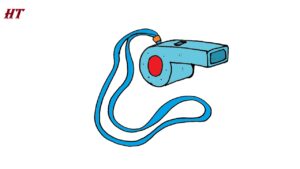
How to draw a Whistle with this how-to video and step-by-step drawing instructions. Easy sports drawings tutorial for beginners and all.

Please see Whistle drawing tutorial in the video below
You can refer to Whistle simple step-by-step drawing guide below
Step 1. Draw the Whistle Shape:
Start by drawing the main body of the whistle. A whistle typically has a cylindrical shape with a wider portion at the bottom and a narrower portion at the top.
Step 2. Add the Mouthpiece:
At the narrower end of the whistle, draw a small rectangle or oval shape to represent the mouthpiece. This is the part where someone blows into the whistle.
Step 3. Create the Sound Chamber:
Just above the wider end of the whistle, draw a slightly curved shape to represent the sound chamber. This is where the sound is produced. Connect the sound chamber to the main body of the whistle.
Step 4. Draw the Finger Grip:
To make the whistle look more realistic, you can add a few lines or a textured pattern around the main body of the whistle to represent the grip or where someone holds the whistle.
Step 5. Add Details:
You can add small details like buttons, knobs, or lines to make your whistle drawing more interesting. Whistles often have small features that can be included for a realistic touch.
Step 6. Refine and Erase:
Go over your drawing, refining the lines and shapes. If there are any unnecessary or overlapping lines, use an eraser to clean up the sketch.
Step 7. Ink or Shade (Optional):
If you want to give your drawing a more finished look, you can outline it with ink or shade it with a pencil. This step is optional and depends on your personal preference.


