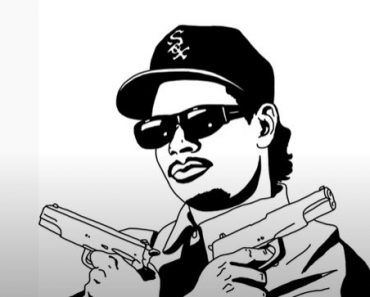
How To Draw A Pistol easy with this how-to video and step-by-step drawing instructions. Easy drawings for beginners and everyone.
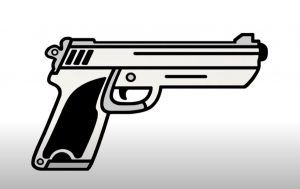
Please see the drawing tutorial in the video below
You can refer to the simple step-by-step drawing guide below
Step 1
To start this tutorial on how to draw a pistol, we’ll start by contouring the pistol’s trigger guard and handle.
For this first step, you may want to refer fairly closely to the reference image provided and copy the shape as it appears there.
Using some curves, we’ll draw the back of the handle border along with its base and front. Then the contour of the trigger guard will be drawn with another curved and rounded line.
We’ll then draw the trigger itself by drawing a thin, curved shape inside the outline for the trigger guard.
Step 2 – Next, start drawing more pistol outlines in this step
For this second part of your pistol drawing, we’ll add even more to the outline for the pistol. First, use a straight line on top of the parts of the outline that you drew.
Then use a shorter straight line in front of the contour to complete this part of the gun.
Once that sketch is done, we’ll draw a rectangular vertical shape inside the pistol grip.
You can then draw a small circle with a straight edge near the top of the border to secure the gun.
Finally, you can finish the contour of the trigger guard as shown in the reference image.
Step 3 – Draw some more contours in this step
We will continue to add contour and detail to the image in this step of the how to draw a pistol tutorial. To do this, we will draw the top, or barrel, of the pistol.
To do this, we’ll use some slight curves along with some longer straight lines.
Here’s another part where you might want to closely copy the reference image provided, as there are some protrusions from the gun outline.
You can also draw a hammer on the back of it by drawing a circle with a small circle in it. Once you’re happy with how it looks, we’re ready for step 4!
Step 4 – Now, add some more details to the pistol
Some of the sequels to your pistol drawing will be based on adding some smaller details to your painting to make the picture look more realistic.
Most of the lines that we’ll be adding in this fourth step will be pretty straight, so you might find it a bit easier to use a ruler to draw most of them.
Some of the smaller parts of the lines will be slightly more curved and rounded for some more realistic images.
Do our best to draw these details exactly as they appear in the example image, and then we can move on to some final details in the next section.
Step 5 – Draw the final details of your pistol drawing
Before you bring some color into your painting, we have a few final touches and details to add in this fifth step of our how to draw a pistol tutorial.
We’ll start by adding more lines next to each other near the bottom of the pistol barrel. You can then add some small circles to certain areas of the pistol to have some bolts holding it together.
Once you’ve added these various details, you’re ready for the final step! There are also some details of your own that you can add to really complete it.
One idea would be to draw a hand holding a gun, or you could draw the background to show where the gun is being used.
How would you like to end this picture?
Step 6 – Finish your pistol drawing with some color
Pistols aren’t exactly known for their bright color schemes, so we used some more muted, realistic colors for this version of our pistol drawing.
We used several shades of brown for the pistol grip, and then we used various shades of gray for the metal parts of the gun.
You can try recreating these colors or changing the shades slightly if you like.
Once you know the color you want to give it, you can then decide which art medium you feel is best suited for this drawing. We can’t wait to see what you choose!
