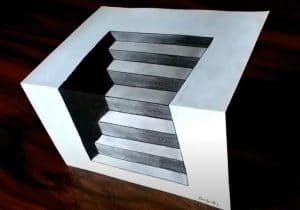
How to Draw 3D Stairs easy with this how-to video and step-by-step drawing instructions. 3D drawing easy for beginners and everyone.

Please see the drawing tutorial in the video below
You can refer to the simple step-by-step drawing guide below
Step 1
Start by outlining the edges of the stairs. Connect six lines to form an irregular shape. It will look like an open book.
Step 2
Mirror the irregular shape by placing a smaller version of it in the first image. Again, use six lines to surround a shape like a curved rectangle or an open book.
Step 3
Start drawing individual steps in stairs. First, draw some lines in the image that are unusually smaller. They should be parallel to the top of this shape. Then, connect the lines using short lines. These short lines will form a zigzag pattern.
Step 4
Continue to draw parallel lines. Connect them at the end using short lines, extending the zigzag pattern.
Step 5
Draw the next steps on the stairs using two parallel lines. Connect them at the end using short lines.
Step 6
Draw another step, again using parallel lines. Continue zigzag modeling to connect them by short lines.
Step 7
Draw more parallel lines until the steps have reached the bottom of the stairs. Connect them at the ends using short lines.
Step 8
Now it’s time to shade your stairs to give it a three-dimensional look. Shade the left wall of the steps.
Step 9
Shade the front of the steps. Stretch narrow lines of different lengths from the right side of the stairs to represent shadows. Show the perpendicular to the corner of each wall by drawing a short line.
Step 10
Color your three-dimensional stairs.


