How To Draw A Pinky Promise easy with this how-to video and step-by-step drawing instructions. Pencil drawings for beginenrs and everyone.
Please see the drawing tutorial in the video below
You can refer to the simple step-by-step drawing guide below
Step 1
As we mentioned in the introduction to this tutorial on how to draw a rosy promise, hand painting is a challenge in the best of times. That’s why we’re going to break it down into smaller, more manageable steps.
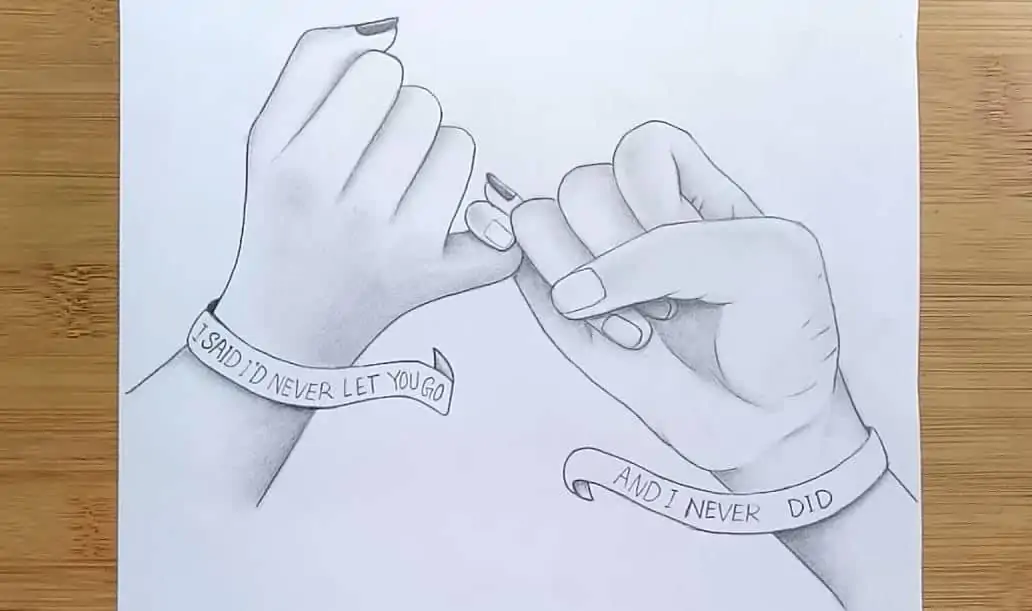
For this first part, we will draw the left hand. This is the step where you may want to try and reproduce the lines exactly as they appear in the reference image.
Using a curved line, you can draw the wrist leading to the thumb of the hand. You can use a small and flat shape at the tip of the thumb for the nail there.
Then we’ll use some more rounded lines for the first two fingers to be bent. You can also draw some small lines at the base of these fingers for the knuckles.
Step 2 – Draw some more hands and first fingers for the other hand
In the second part of your rosy promise drawing, we’ll draw the rest of the hand you started with in the previous section.
We’ll also add the first finger of the other hand, but let’s focus on the first hand first.
Use another long curved line for the next bent finger on the hand you started with in the last step. Then, apply a long and fairly straight line to the other wrist.
You will then draw the little finger of your other hand using a circle with a nail on it.
This will connect to the bent little finger of the first hand, so try your best to duplicate the little finger as shown in our reference image.
Step 3 – Next, draw more hands
With the first hand that you drew in this pink promise tutorial, the back of the hand is facing us as the viewer.
For the seconds hand, on the contrary, we will see the fingers curled. With this in mind, use a curved line for the left side of the wrist for this hand.
It should extend down from the bottom of the little finger from the other side.
Once that side of the wrist has been drawn, you can then draw the thumb near the middle of the hand. Again, you should try to copy exactly this thumb as shown in the reference image.
Step 4 – Now draw the rest of the fingers for the seconds hand
You are now ready to complete the fingers for the seconds hand in this part of your rosy promise drawing.
We’ll be using some curved, curved lines to show the curled fingers as they appear in our image. Due to the position of this hand, the thumb of the seconds hand will go over the fingers.
There’s a few line details that we’ll add on the bend of the fingers for more realism, and then you’ll be ready for the final elements in the next section.
Step 5 – Add some final details to your rosy promise drawing
We’ll be working on the final details in this step of the tutorial on how to draw a rosy promise. To do this, we mainly need to perfect the wrist for the seconds hand.
First, use a curved line for the lower part of the hand to which the thumb is attached. Once you’ve drawn, you can use an extra line for the wrist of this hand.
Finally, we’ll add some simple line details to the area below where the thumb is pressed down.
Before proceeding to the final step, you should also add any additional details of your own that you might like! Maybe you could paint a fun background to really finish it off.
Step 6 – Complete your rosy promise drawing with some color
This is the final step of your rosy-promised painting, and in it you’ll bring this drawing to life using some amazing colors.
There are so many different skin tones and colors you can use to color this drawing, so you can have a lot of fun choosing the colors you use!
There are also options for the art medium you use to perfect it.
Acrylic paints and watercolors are perfect for a more painterly look, while pens or crayons can help create more vibrant shades. What will you choose for your drawing?


