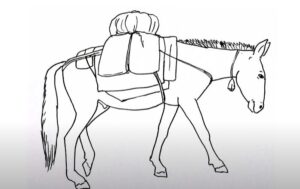
How to Draw a Mule with this how-to video and step by step drawing instructions. Beginners will benefit from this simple step by step lesson for learning how to draw a mule.

Please see Mule drawing tutorial in the video below
You can refer to Mule simple step by step drawing guide below
Step 1. Create a snout
Create the shape of the mule’s muzzle as shown. Add two thin ovals to draw the nostrils. Then, create an upward curve to draw the mouth.
Step 2. Sketch the head
Sketch the curved shape of the mule’s head.
Step 3. Add eyes
Draw two shaded ovals to add the mule’s eyes.
Step 4. Attach the ears
Attach the elongated shape of the mule’s ears to the top of its head.
Step 5. Sketch the body
Sketch the oval of the mule’s body.
Step 6. Draw the mane
Form the jagged shape of the mule’s mane on the back.
Step 7. Attach the legs
Draw the shape of the mule’s legs connected to the lower part of its body. Add a curved line near the end of each leg to form the hoof.
Step 8. Add tail
Create the long thin shape of the mule’s tail. Then, form the pointed tip of its tail as shown.
Step 9. Complete the mule drawing
Let’s complete our mule drawing by adding color! First, use cream crayons to color the muzzle, inner ears, and underbelly. Next, use a dark brown pen to color the mane, nails and tip of the tail. Finally, shade the rest of the mule’s body with a brown pencil.


