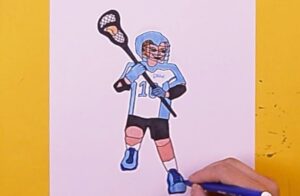
How to Draw a Lacrosse Player with this how-to video and step-by-step drawing instructions. Easy sports drawing tutorials for beginners and all.

Please see Lacrosse Player drawing tutorial in the video below
Lacrosse Player Drawing Step by Step
Step 1. Draw the Lacrosse helmet
First, draw a dome-shaped outline of the lacrosse helmet. Then, add V-shaped lines along the top of the helmet.
Step 2. Sketch the face guard
Next, create the thin outline of the face guard that attaches to the base of the helmet.
Step 3. Add the body
Now, draw the vertical shape of the lacrosse player’s body. Then add curved lines for the collar.
Step 4. Attach the arms
Draw the player’s elongated arms attached to the torso. Then, form gloves on both ends of the arms as shown.
Step 5. Shape the Lacrosse stick
Start by drawing the long stick-shaped shaft of the lacrosse stick. After that, create the wavy contour of the head.
Step 6. Add string
Draw evenly spaced lines in a diagonal pattern to add the strings of the lacrosse stick.
Step 7. Draw the shorts
Now, sketch the shape of the shorts attached to the torso.
Step 8. Shape the legs and shoes
Next, draw vertical lines below the shorts to outline the legs. Then, create the shape of the shoes similar to the illustration.
Step 9. Complete the Lacrosse player drawing
Let’s color our drawing of a lacrosse player! First, color the helmet with an orange pen and the face guard with a white pen. Next, color the shirt and shorts using blue and orange crayons. Now, use a red pencil for the gloves, a dark blue pencil for the socks, and a brown pencil for the shoes. Then, color the skin with a peach colored pencil. Finally, fill in the body of the lacrosse stick with a light gray pencil and the tip with a red pencil.


