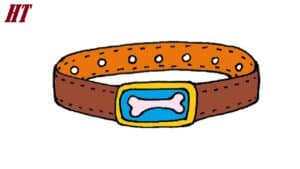
How to Draw a Dog Collar with this how-to video and step-by-step drawing instructions. Dog collars are useful, as they often help find owners of lost pets.

Please see Dog Collar drawing tutorial in the video below
In this tutorial, I will show you how to draw a dog collar. This guide has nine simple steps. You can certainly do this job even if you have no drawing experience. I have specifically created this lesson in a way that can be done by children and aspiring artists.
A dog collar is a product in the form of a collar made of leather, rubber or other materials with a leash. A collar is worn around the animal’s neck to control the pet’s mobility. In addition, the collar is proof that the dog has a home and an owner. Usually, a small sign is attached to the collar, which contains the owner’s address and phone number.
Following these instructions, you can draw a very nice and bright dog collar. Now let’s get started on the dog collar drawing tutorial!
Dog Collar Drawing Step by Step
Step 1. Draw the top contour of the dog’s neck.
Do this using a curve. The contour of the dog’s collar should resemble an oval.
Step 2. Outline the sides of the collar.
Draw them using two short curved lines.
Step 3. Add border to the bottom of the collar.
Draw two curves as shown in the example.
Step 4. Create the inside of the collar.
You can describe this with curves.
Step 5. Draw the outline of the collar label.
This detail will look like a rectangle.
Step 6. Sketch the holes inside the collar.
Describe these elements as small circles.
Step 7. Decorate the dog collar plate.
Draw bones on this plate.
Step 8. Add decorative elements.
Do this using a dashed line for the seams on the dog’s neck.
Step 9. Color the drawing.
To color this drawing, use brown, orange, yellow and beige colors.
You can see more drawing:


