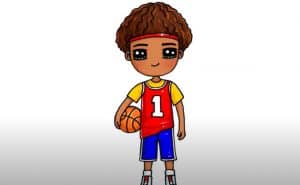
How to Draw a Basketball Player easy with this how-to video and step-by-step drawing instructions. Easy drawing tutorial for beginners and kids.

Please see the drawing tutorial in the video below
You can refer to the simple step-by-step drawing guide below
Step 1
To begin with, let’s draw the skeleton of our basketball player. Outline the head and a long line of the spine, on which we draw the shapes of the chest and pelvis. With the help of long lines outlines the arms and legs. Note that our basketball player must be taller than the average person.
Step 2
On top outline two lines that intersect, this will help us draw the face’s details later. Next, we outline the neck and body contours. With the help of simple geometries, sketch outlines of arms and legs. In the right hand draw a round ball.
Step 3
On the top outline the contours of the details of the face by orienting the junction lines from the previous step. On top, we also outline the lines of the hairstyle and ears. With the help of light lines, we outline the contours of loose clothing and shoes.
Step 4
Using clear and bold lines, carefully draw out the contours of the facial details (eyes, nose, and smiley mouth), as in our example. Next, outline the lines of the hair and the face. Be sure to remove all unnecessary instructions from your face.
Step 5
Now move lower and work with the body details. Let’s start with the contour of the neck. Next, use clear and dark lines to draw the contours of the sleeveless basketball shirt. Remove all unnecessary guides from the body and outline some creases of the fabric.
Step 6
With the help of smooth lines draw outlines of the delta, biceps, triceps and anterior biceps. Carefully draw the hands, balls and lines on the ball. Remove all unnecessary instructions from the arm.
Step 7
A fairly simple step in which we are going to draw shorts. With the help of long lines draw many creases on the loose shorts. Take an eraser and remove all unnecessary guidelines from the shorts as shown in our example.
Step 8
In this step we will finish drawing the body of our basketball player. With the help of long and smooth lines carefully draw the contours of the basketball shoes and sneakers. Note that the basketball player’s body must not be too muscular and his muscles must not be noticeable.
Step 9
The lesson on how to draw a basketball player is almost done, and we just need to make it bulky, add some shadows. First, we need to find out where the light comes from, and then add shadows of different intensity.
As you can see, this lesson is quite difficult, but by the end of this lesson we have a very realistic basketball player drawing. If you liked this lesson, visit our directory titled “Everyone”. But if this lesson is too difficult for you, be sure to move to the “For Beginners” category. Anyway, register with us on social networks and visit our website as often as possible, so as not to miss out on .com’s new drawing lessons.


