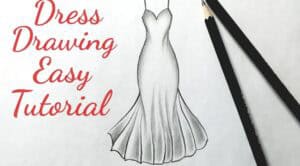
How to Draw a Wedding Dress with this how-to video and step-by-step drawing instructions. This tutorial is very helpful and simple.

Please see Wedding Dress drawing tutorial in the video below
I want to introduce you to a new lesson in which I will show you how to draw a wedding dress. Hope you enjoyed this tutorial and have a good time.
Now you will learn how to draw a wedding dress step by step. Wedding is an important event in everyone’s life, so they prepare for this event very carefully.
Every bride wants to look gorgeous and is serious about choosing a dress. Most often, a white puffy dress is worn at a wedding and complements the image with various accessories.
The drawing shows a simple yet elegant wedding dress, which you can easily draw thanks to the available tutorials. Lessons are designed for beginners, so simple lines and minimal elements are used here.
Materials
- Pencil
- Paper
- Eraser
- Coloring supplies
Wedding Dress Draing Step by Step
Step 1. Draw the outline of the top of the dress.
Using a few lines, draw a trapezoid where the top border is rounded.
Step 2. Sketch the neckline and sleeves.
Depicts smooth circular lines on the top and sides.
Step 3. Add details.
With the help of some lines, give the dress the same shape as in the example.
Step 4. Draw the belt.
Draw straight, even lines to create a wide belt.
Step 5. Add details.
Draw two lines in the center to create a pointed outline.
Step 6. Outline the bottom of the dress.
From the waist, draw smooth lines on each side.
Step 7. Draw the bottom border and add the creases.
Draw a smooth line at the bottom. Add a few thin lines from the waist.
Step 8. Correct the inaccuracies.
With an eraser, carefully remove all unnecessary lines.
Step 9. Color the drawing.
Usually, wedding dresses are white, but you can use any color.


