How to draw Fashion Girl with Beautiful Dress with this how-to video and step-by-step drawing instructions. Pencil drawing tutorials for All.
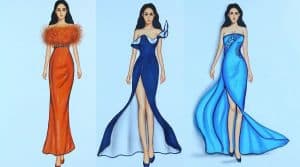
Please see the drawing tutorial in the video below
You can refer to the simple step-by-step drawing guide below
Step 1
First we need to set up a basic shape. The girl I drew is standing in a very basic cute girl pose with her hands clasped behind her back and toes turned slightly inward. To establish a proper form, draw a basic circle for the head, trying not to make it too small or too large.. keep it the same width as the circles at the shoulders. Draw circles at the shoulders and a line to indicate the position of the shoulder bridge, a vertical line of the torso and an upside down bowl with the club feet coming out from there.
Step 2
First, determine what her head will look like. Use the circle to make your anime chin and draw some guide lines for the face. It is best to use the curve of the right side (Your right, not hers) of the circle and start dipping in with the curve and then pulling out to create the corner of the cheek. This helps shape your head instead of just a straight line.
Step 3
Using the guide lines, draw in the outer part of the eyes, nose (If your nose crosses your head line like mine, you may need to redraw it later) and a smile. Keep the smile slightly higher than usual as her mouth will be open.
Step 4
Now, create the circles or irises of the eyes. Make a low curve that touches the corner of your mouth and draw a small hill in your mouth for the smile. Under the low curve, draw a small curve to show the lower lip. Draw some eyelid lines above the eyes.
Step 5
Now we want to erase the circle on her head, so let’s draw the top of her bangs and the shape of her hair. Right on top of her bangs, there should be a slight curve and blowout to show the rest of the bangs being pushed out of view. Pull the hair out of the head.
Step 6
You can now delete your headlines and guide lines, they are no longer needed. Even so, leave your neck and rest of your body alone. Draw the rest of the bangs in the clip and some shoulder length hair.
Step 7
I’ve lightened my guides so the lines don’t get confused. As you can see, I drew your sleeve not touching but hovering over your guides. Towards the bottom of the sleeves, stick out a little. Starting at the bottom of the shoulder circles, draw a curve outward and over the bowl to create the waist and start of the dress.
Step 8
Before we continue, wish could fulfill the entire upper body. Draw at the bottom of the hair hidden behind the sleeve. Draw two small curved rectangles at the bottom of your shaggy sleeves and her arms hidden behind hers. Draw the neckline and square neckline of the dress. If you’ve seen my chibi sewing tutorial, note that I use the same fastening technique for the neckline as you can see. Clothes are not flat for her.
Step 9
Before we begin the bottom of the dress, there are a few things you need to know about how the pleats will work. Notice the blue line that establishes how the folds will go. This is the bottom part of the dress and must not be disconnected. The line must be continuous even if it reaches a sharp angle, no line breaks at all or you will lose the desired effect. The red lines show how the skin will evolve around your connector.
Step 10
Now! Try it for practice this time. Draw in a seamless floral pattern, with a few lines coming from the upper points of the flow to show how the dress folds.
Step 11
Before we finish the bottom of the dress, we need to place the legs and feet. Follow your bar guide lines to create your feet. If you’re having a hard time, think about one of those ball-joint dolls and how the feet would look and move. I drew an example next to the leg.
Step 12
Now you can draw on the sides of the dress where the fabric connects and flows behind the legs. This gives your dress depth and shows that it’s more than just a plain cardboard taped over her. You can complete your drawing by adding rounded rectangles to show her shoe line, eyebrows, and even a cute little beanie on top of her head.
Step 13
Once done, you can delete any lines of instructions that may still be showing and clean up anything that might look cluttered and you’re done! Well done and have fun coloring!

No Responses