How to Draw A Muscular Arm easy with this how-to video and step-by-step drawing instructions. Easy drawing tutorial for beginners and kids.
Please see the drawing tutorial in the video below
You can refer to the simple step-by-step drawing guide below
Step 1
If there was one thing that was even harder to draw than a muscle, it would have to be the human hand. Hand drawing can be intimidating to the hearts of even the most seasoned artists, so we’ll be drawing slowly in this first step of our how to draw a muscular arm tutorial.
Two suggestions for this drawing is to use a pencil at first, and also to follow the reference image closely as you draw.
The reference figure will show you how to draw the proportions of the hand and fingers. The wrist and hand will be drawn with some rather rough lines, which will then result in curled fingers.
Once you’re happy with the shape of your hand, you’re ready for the next step!
Step 2 – Draw the first wrist and muscle for the arm
For this second part of your muscular arm drawing, we’ll extend the arm down from the hand you drew earlier.
The hand should lead to some pretty straight lines for the wrist of the arm. Then that line will curve slightly to the left for some subtle muscle detail and there will be a sharp curve at the bottom for the elbow.
The line on the right hand side will be even more curvy with respect to the muscle there.
Step 3 – Next, add some muscles on the arms
In this third part of the muscular arm tutorial, we’re going to draw some more muscles for the arm.
To do this, you will use two large, circular lines for the biceps of the arms. These lines will overlap to show that the muscles are working against each other.
Once you have it like in our reference image, you’re ready to go!
Step 4 – Draw some more muscles for the arm
We will draw some muscles for the lower arm for this part of your muscular arm drawing. First, use another curved line extending from the elbow to the lower part of the biceps.
You can then add some more rounded lines to the inside of the arm to create a muscular look, as shown in the reference image. Once you’ve drawn these lines, we’ll be ready to add some final details in the next step.
Step 5 – Now you can add some final leaves for the muscular arm
We’ll be adding some color to your painting soon, but first, we have some final details to add to this fifth step of the tutorial on how to draw a muscular arm.
Using our reference image as a guide, you can add some curves all over the arm to add an even more muscular look. These lines are a simple drawing but will be very effective in making the arms look more realistic.
Then you’re ready for the final step, but before you continue, you can add some details of your own! There are many things that you can do to make this drawing interesting. You can draw a background that can be a more context or style with various shapes.
If you’re feeling more creative, you can also draw some more body parts to which the arm is attached. Maybe you could also draw a cool tattoo on your arm!
These are just a few ideas, but the possibilities are endless! How would you complete this muscular arm drawing before the final step?
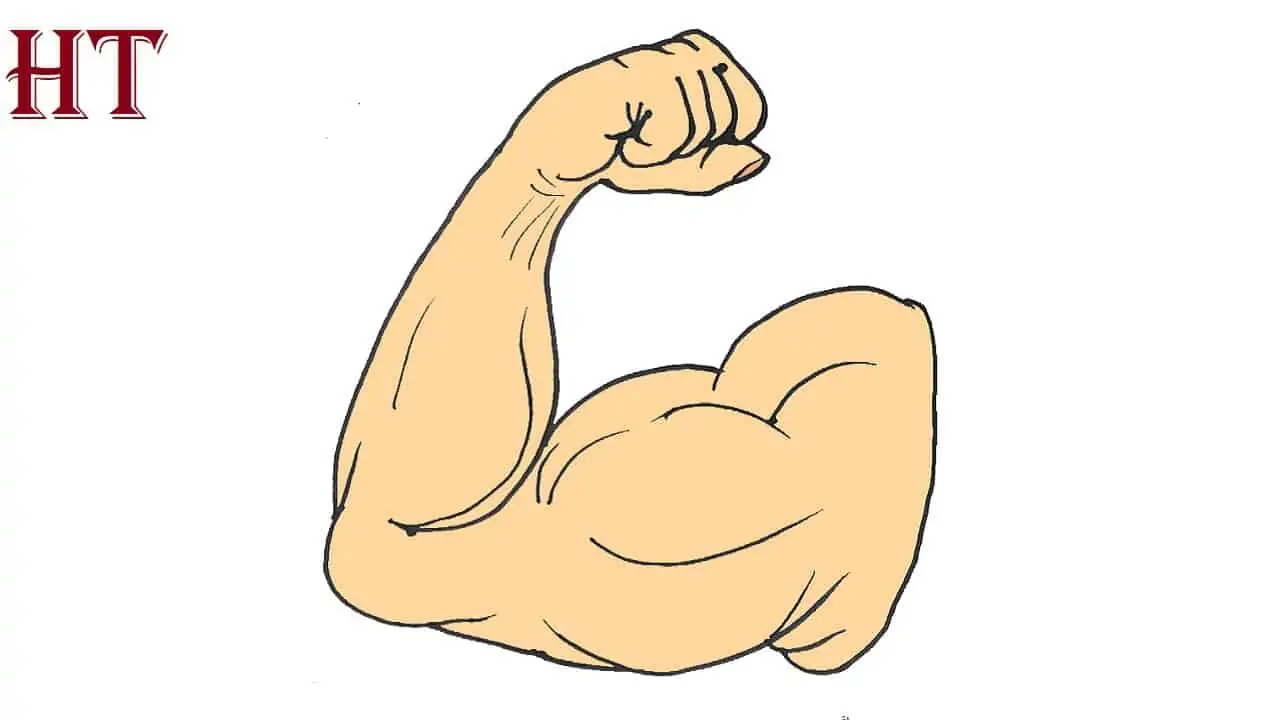
Step 6 – Finish your muscular arm drawing with some colors
This is the sixth and final step of your muscular arm drawing process, and you can relax with this step adding some awesome color to it.
We already showed you a color tone you can use for this drawing, but here is the step where you can get creative with it and use any color you love.
However, your color choice is only part of the creative fun. You can also have a great time choosing the art media and tools that you will use to color your painting.
If you want brighter and darker colors then you can use crayons, markers or acrylics for some examples. It would also look great with some more subtle colors, and you could use some watercolors, crayons or crayons.
These are just a few suggestions, but it’s up to you! We can’t wait to see what color you choose in your painting.


