How To Draw Gollum from Lord of the Rings LOTR with this how-to video and step-by-step drawing instructions.
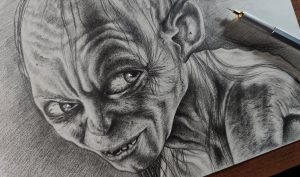
Please see the drawing tutorial in the video below
You can refer to the simple step-by-step drawing guide below
Step 1
Draw a circle for the top of Gollum’s head and then draw a triangle below it drawing a line from the top of his head down to his chin. This line should not be straight, but should follow the contours of the head. Then draw a line for where his eyes will go and a line for his mouth and nose.
Step 2
Draw his eyes and nose shape as well as his mouth and teeth. Sketch his pointy ears. Start defining some key shapes on his face such as his jaw. Draw on his torso.
Step 3
Start shading his head AFTER you think you’ve got the right sketch. His eyes are bright but blurred around the eyelids. I deleted my original guidelines here but they can help you with shading if you don’t delete them as it will help you with 3D drawing. I also pulled out some instructions for his arm.
Step 4
Continue to cover his head and neck. Focus on the wrinkles and contours of his face.
Step 5
Paint on his hair and continue to shade on his body. Draw the spots he has on his skin, especially around his mouth. Now he’s starting to look pretty handsome.
Step 6
Shade his body so you can see the ribs and bones on his neck and the like. I used a diagonal shade for the skin on his arm.
Step 7
Finish shading your feet. Blend the skin tones that you should. Redefine the highlights with the kneading eraser and darken the tones you lost due to blurring. Make any finishing touches you want and add background if you want.
