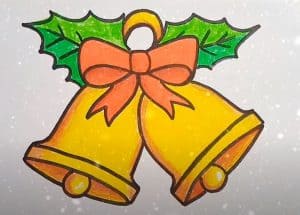
Christmas Bell drawing easy with this how-to video and step-by-step drawing instructions. How to draw for beginners and kids…

Please see the drawing tutorial in the video below
You can refer to the simple step-by-step drawing guide below
Step 1:
We will start our bell drawing by sketching the ribbon of the bells. We’ll draw the stripes using some curved lines in a two-sided root shape, as shown in the reference image on both sides of the bell.
Step 2:
In this 2nd step, we will draw a couple of pairs of bells by drawing an elliptical oval. Now we’re going to use circular inverted “u” shapes to draw the bell with some circles for the neckline. Then we will draw a horizontal curve along the channel of a bell. That gives a bell a spherical shape.
Step 3:
In this 3rd step, we will start sketching the holy leaves surrounding the bells. Then we’ll draw a few small circles to show the knot of the ribbons. You can use a reference image as a source for more details or any missing steps.
Step 4:
In this step, we will draw a bow that ties the bells together. We will draw the arc using some curves and circles.
Step 5:
Finally, our bell drawing is ready for coloring. Usually, bells come in two colors, gold and silver. Your kids can use bright and cheerful colors like red, green and yellow to make this drawing adorable and gorgeous to add to their collection books.
Last word:
So, I hope you enjoyed going through this guide. You are now well aware of the bell pattern. You are now completely dependent on your efforts for this worksheet. Using color, artistic media and additional details will enhance your drawing expertise. Drawing is an engaging and quality time-consuming activity. So keep drawing your pages and visit our website for easy drawing tutorials.


