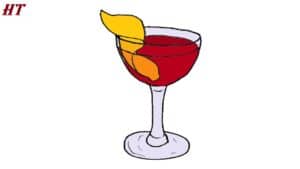
Please see Cocktail Glass drawing tutorial in the video below
Cocktail Glass Drawing Step by Step
Step 1: Sketch the Outline
Start by drawing a slightly curved vertical line. This line will represent the center of the glass. Then, draw a half-circle above it to create the top rim of the glass. Ensure that both ends of the curved line meet smoothly.
Step 2: Draw the Bowl of the Glass
From the ends of the curved line, draw two slightly curved lines that extend downward. These lines should form the sides of the glass. Connect the ends of these lines with a curved line at the bottom to create the bowl of the glass. This part is usually wider at the top and tapers towards the bottom.
Step 3: Add the Stem
Underneath the bowl of the glass, draw a long, vertical rectangle or oval shape to represent the stem. Make sure it’s centered and proportional to the bowl of the glass.
Step 4: Base of the Glass
At the bottom of the stem, draw a flat, circular or oval shape as the base of the glass.
Step 5: Refine and Detail
Refine the outlines of the glass by erasing any unnecessary lines and sharpening the edges. Add details like a decorative pattern on the stem or any embellishments that the glass might have.
Step 6: Finish with Details
Add final details such as the drink within the glass, a garnish like a slice of fruit or an umbrella, or any other elements to make it look like a cocktail.

No Responses