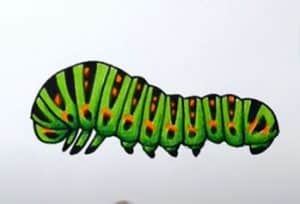
How To Draw A Caterpillar easy with this how-to video and step-by-step drawing instructions. Insect drawing for beginners and kids.

Please see the drawing tutorial in the video below
What you’ll need:
- HB (#2) Pencil, 4B pencil
- Eraser
- Drawing paper
- Drawing surface
You can refer to the simple step-by-step drawing guide below
Step 1
Draw a long oval for the caterpillar’s body. The head of the oval should be twice as thick as the tail. At this point you will be left with what looks like a blob, but it will soon make sense.
Step 2
If you’ve ever noticed, caterpillars have very strange legs. They are more like stumps than real legs. To make these, draw about six or seven half-circles below the caterpillar’s body that will wrap around the stick.
Step 3
In addition to the stout hind legs, the caterpillars also have three clawed legs on each side of the body near the head. To make these, draw three thin triangles, each of which gets smaller as they get closer to the tip.
Step 4
Clean up your excess lines from the previous steps and you should start to see your caterpillars take shape.
Step 5
Now we need to create the head of the caterpillar by drawing a half circle near its front legs. As you can see, the caterpillar’s head is located slightly inside its body, so it looks like it has a leather hood around it.
Also, give it a large oval eye near the end of its head.
Step 6
At this point, you’re pretty much done with your caterpillar. All that’s left to do is add a few final details.
If you’ve ever noticed, most caterpillars have segmented bodies. Do this by drawing about 10 vertical lines running down the caterpillar’s body.


