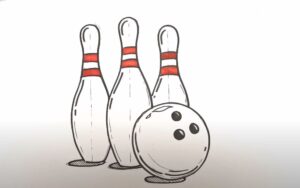
How to Draw Bowling with this how-to video and step-by-step drawing instructions. This cool bowling lesson is just right for younger artists like you who are excited to start their drawing journey.

Please see Bowling drawing tutorial in the video below
You can refer to Bowling simple step-by-step drawing guide below
Step 1. Draw the gutter
First, draw diagonal lines to outline the gutters on each side of the figure.
Step 2. Sketch a bowling ball
Now, shape a bowling ball in the middle.
Step 3. Add striped pattern
Draw four curved lines on the pin’s neck.
Step 4. Draw a bowling ball shape
Draw nine more bowling pins in a shape similar to the illustration. Don’t forget to add stripes on the bowling pins.
Step 5. Add bowling balls
Next, draw a large round bowling ball in front of the pins. Then add three small clamp holes on the ball.
Step 6. Complete the bowling drawing
Let’s color our bowling drawing! First, fill in the bowling pins with red and white pencils. Next, color the bowling ball red. Now, use a yellow pen to color the floor of the bowling alley. Then, use a brown pencil to color in the edges of the bowling alley and a black pencil to fill in the gutter.


