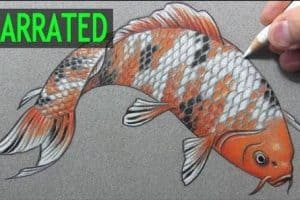
How to Draw A Coy Fish easy with this how-to video and step-by-step drawing instructions. Fish drawing for beginners and everyone.

Please see the drawing tutorial in the video below
You can refer to the simple step-by-step drawing guide below
Step 1
Start by drawing a circle. This will form the head of the fish.
Step 2
Extend two long curved lines from the top and edge of the circle. These outline the curvaceous body of the fish.
Step 3
Use a long and thin “M” shape to wrap the fishtail.
Step 4
Add fins to the body of the fish. Do so by enclosing irregular shapes along the sides of the fish. Each side of the fish’s head should have one pectoral fin and two more near the tail.
Step 5
Detail and shape fish face. Using a long, curved line, extend from side to side of the head. Notice the flatness of the mouth.
Step 6
Remove the guide lines from the fish head.
Step 7
Detail your koi. Along the base of each fin and the ends of the tail, draw short straight lines, indicating the ribs of the fins. Then draw a curved line down the center of the face, creating depth. Draw a curved and loose “V” shape on one side of the face, more detail for the contour. Finally, draw the dorsal fin on the back of the fish. Do so by enclosing a curved triangle and lengthening the curvature of the fish’s body.
Step 8
Erase the guide lines on the fish’s face and dorsal fin.
Step 9
Complete your fish with additional details. Draw short veins on the dorsal fin. Draw a small oval within a larger oval to represent the eyes; smaller oval shade. Draw a small, nearly complete circle at the tip of the fish’s nose. Alternatively, draw lines or whiskers, using two short curved lines that meet at a point. Draw a second line on the other side of the face. Finally, draw scales all over the body of the fish. Do so using short, interconnected “U” shaped lines.
Step 10
Color your koi fish. This fish is usually seen in white, brown, orange, red, green and yellow colors.


