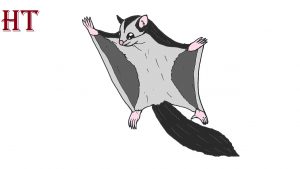
How to draw a Sugar Glider easy with this how-to video and step-by-step drawing instructions. Wild animals drawing for beginners and kids.

Please see the drawing tutorial in the video below
You can refer to the simple step-by-step drawing guide below
Step 1
Draw the head by creating a rough circle, leaving room for the neck and two outwards for the ears.
Step 2
Use the unfinished ovals to define the ears, a circle with two dots for the nose, and two circles inside the other circles for the eyes. For the mouth, create a half-moon shape and add a line for the tongue.
Step 3
Draw the body with a curved line on the right side going down and an almost vertical line on the left side coming from the head.
Step 4
Draw the front foot by continuing down your path on the left side and start drawing the toes. Make sure to enlarge the toes. Then draw the rest of the leg with a wavy diagonal line.
Step 5
Draw the hind legs facing left and add lines for the toes.
Step 6
Draw the remaining front leg like the front leg, but facing you instead of partially to the left.
Step 7
Withdraw the other hind leg by continuing to cut the right side of the body and add the toes, closing it at one of the front legs.
Step 8
For the tail, draw a rounded rectangle, curves slightly up in the top left corner and joins the body. Your glide is now complete!


