Princess Celestia Drawing easy with this how-to video and step-by-step drawing instructions. How to draw My Little Pony for beginners and kids.
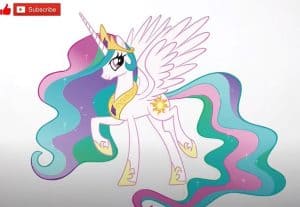
Please see the drawing tutorial in the video below
You can refer to the simple step-by-step drawing guide below
Step 1
You will draw Celestia from a side that will be two separate shapes from each other. Start by shaping the head, then draw the body.
Step 2
Instead of immediately connecting the body, You will focus on drawing her face first. Start by outlining the big teardrop shape of her eyes like that, then draw a thick and bold upper lash line with the lashes. Next, draw the first line for her mane, and then outline the shape of her jaw, cheeks, and muzzle which is also her mouth.
Step 3
Draw in her ear, then draw a long, narrow unicorn horn. Add stripes to the horns, and then draw eyeballs. Draw the nostrils, then outline on her crown as well as some curved mane on her cheeks.
Step 4
Okay, you guys are going to have even more fun because now we’re going to tackle the real long mane. Draw out a large cloud-like shape just at the end. Draw the neck, then the crest she wears around her neck, then the jewel in her crown or tiara.
Step 5
I find it easier to draw her beautiful wings before drawing the rest of her body. Start outlining the wings with the front wings being the full body. Sketch the feathers inside her wings like so, and make sure you also add some defining details.
Step 6
Now we’re going to start working on her body by drawing out the long legs and then rounding away from the foot like that and expanding the shape of her legs as you go down. Finally for this step, draw the jewel on her crest and then move on to step seven.
Step 7
Draw the rear end of Celestia, and then draw her hind legs standing very strong, sturdy, and bold. Once the pins have been drawn, you can move on to step eight.
Step 8
Okay, now you can draw the extremely long tail and when you create the tail, remember to add that wavy lining for both sides. Erase the lines and shapes that you drew in step one, and then you’re done.
Step 9
Now that your drawing is clean, you can draw marks on your hooves and sunburn on your hips.
Step 10
This is the finished line art when you’re done. Now you can color her mane and tail more interestingly using shades of the rainbow.
