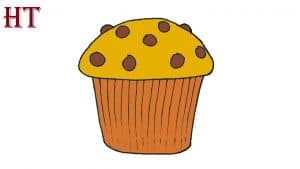
Muffin Drawing easy with this how-to video and step-by-step drawing instructions. Easy drawing tutorial for beginners and kids.

Please see the drawing tutorial in the video below
You can refer to the simple step-by-step drawing guide below
Step 1 – Draw the Outline of the Muffin
Start by sketching the top and bottom of the muffin. Make the top similar to a mushroom cap with the bottom shaped like a wide bucket (wider at the top).
Step 2 – Draw the Chocolates
On top of the muffin top add some chocolate chips.
In general, when mixed into a muffin, the chips will tend to be at different angles, some sticking out more than others.
To show this, draw some of the chips more round and others more oval with some having one side look like it was cut out (to show they’re sick inside the cupcakes). Styrofoam). You can also draw an edge line inside some of them to better show the direction a chip is pointing in.
Finally, you can also pull out a few chips protruding from the back of the “muffin lid”.
Step 3 – Draw the folds with wax paper
Add folds along the paper that covers the bottom of the muffin. Draw them with straight lines that are more vertical towards the center and lean more to the sides as they get closer to them.
After you finish drawing the line, re-fill it with darker pencil lines or a black pen/brush.
Step 4 – Coloring Muffin
To color the muffin, you can make it golden brown with the bottom slightly lighter than the top (to show it’s wrapped in semi-transparent white paper).
Make the chocolates dark brown but with some lighter spots on one side of each chip to show the highlights that make the chips look shiny. Color these to be a much lighter brown than the chips.
For another muffin, you can make it a different color. For example, dark orange for a carrot muffin or dark brown for a chocolate cake.


