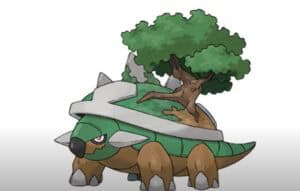
How To Draw Torterra Pokemon with this how-to video and step by step drawing instructions. Pokemon drawing for beginners and all.

Please see Torterra Pokemon drawing tutorial in the video below
Torterra Pokemon Drawing Step by Step
Step 1
Draw a small circle for the head, then draw the body in the shape of an egg.
Step 2
Start outlining the front part of Torterra’s face and then draw the spikes on each side of the face or head. Next, draw a crown that looks like thick metal around the shell of such a body, then draw a flap that makes the whole armor look like a crown.
Step 3
Draw the lower part of the body and then draw each leg like a stout tree stump. Draw some thick rocks like toes or toenails on each foot and then move on to step four.
Step 4
All right, you’ll draw lines that will add detail to the Pokemon’s hideout, then draw a claw-shaped nose, create eyes, and draw eyeballs. Add a line for the mouth and move on to the next drawing step.
Step 5
Finish drawing the shape of such a trunk, then draw out the small bonsai attached to the trunk. This should be a full looking tree with leaves and all. Add some details to the branches and then move on to the next step to complete the drawing.
Step 6
Okay, are you ready to finish off this Pokemon? Me too. You can start by sketching small trees on the other side of the body or the back, then draw another hat for the main tree. Erase any visible guides and shapes that you made in step one to clean up the drawing.
Step 7
Now that you’re done, you can start coloring your land-looking Pokemon. I hope you had fun drawing Torterra, I think you did a great job.


