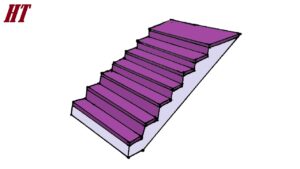
How to draw Stairs with this how-to video and step-by-step drawing instructions. Easy drawing tutorial for beginners and everyone.

Please see Stairs drawing tutorial in the video below
Architectural structure is a common theme in many works of art, and drawing is no exception.
If you want to draw a building or a house, it is important to learn how to draw its main features first, such as stairs.
To make it a lot easier for you, we have created a step by step tutorial on how to draw stairs.
This tutorial consists of 9 easy tutorials accompanied by simple illustrations to serve as a visual guide for you as you follow them step by step.
Stairs Drawing Step by Step
Step 1
We will draw the stairs from the bottom up, that is, we will start from the lowest step and then go up to the highest step.
Start by drawing a diagonal parallelogram in the bottom left of your paper. This forms the first step of the stairs.
Don’t forget to add a line at the bottom and on the right edge of the step. This adds a dimension on the steps to make it appear 3D and realistic.
Remember to continue doing this on all the steps you will draw in the following steps.
Step 2 – Draw the first two stairs
Draw another track one notch higher than the first track we drew in the previous step. Remember that this groove should not be directly above the first one, but should be slightly to the right.
After completing this step, the stairs will now have two steps starting from the ground.
Step 3 – Next, draw the third step of the stairs
Repeat the previous step to make the third track one step higher than the second track. Now, the stairs have three steps. We’re almost there—keep going!
Remember that all notches should be similar in shape and size. The only difference should be their location.
Step 4 – Then add another step on the stairs
Draw another parallelogram with another diagonal one step higher from the third track.
This creates the fourth groove of the stairs. Now, we are only one step away from completing the steps of the stairs.
Step 5 – The Fifth and Last Step Structure
Repeat the previous step to create the top step in the stairs. At this point, you should now have a total of five steps on the stairs.
Remember, the ladder should form a diagonal upward to the right.
Make sure that all notches have thin lines on their bottom and right edges. This adds a three-dimensional effect to the stairs, as mentioned in the previous steps.
Step 6 – Then draw the stairs
Draw a diagonal shape just below the stairs. This forms the lanyard, which serves as the base of the steps.
Then draw vertical lines on the corner edges of each track. This connects all the steps together, exaggerating the structure of the stairs.
Step 7 – Create the central pole of the stairs
Draw one column next to the lowest track and another on top of the highest track. This creates the center column or support column, which serves as the central pillar of the staircase.
Remember that the center poles should be about an inch and a half tall. Also, don’t forget to add lines along the length of the column to create dimension!
Step 8 – Next, Draw Handrails for Support
Draw an upward diagonal shape attached to the top of both center poles. This creates handrails, which people often cling to for support when going up and down stairs.
Make sure to add a thin line along the length of the handrail near its top edge. Same with other parts of the stairs, this creates a three-dimensional effect.
Step 9 – Add Balusters in the Middle of Newels
Draw three more poles in between the bottom and top center poles that we drew earlier in the seventh step. This creates shields, which act as additional support for the handrails.
Remember that the bales are thinner than the center poles.
That’s it—we’ve successfully drawn the stairs! Now finally comes the most fun part, which is choosing and coloring the stairs!
This is your chance to show off your artistic skills, especially your ability to mix and match different colors.
Staircases exist in a wide range of colors, mainly because it can easily be painted with any color depending on the preference of the homeowner.


