How to draw spiderman easy full body with this how-to video and step-by-step drawing instructions. How to draw cartoons for beginners and kids.

Please see the drawing tutorial in the video below
You can refer to the simple step-by-step drawing guide below
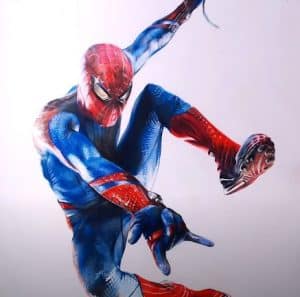
Spiderman drawings in which they are seen in action are best when they are done well, because you see how muscles are activated, and drawings seem to come alive. That’s what happens with this drawing that you have here, in which you are jumping. The various drawings you can see are spiderman, as well as other superheroes always in the beautiful action position. This particular case of Spiderman color drawings is a good choice for you to print and color, because the contrast occurs between blue and red, seeing the character completely in the foreground is great.
Step 1
I make it great for you to copy it. This is the beginning of the Spider-Man figure in children. The first thing you have to do is draw the shape of the head. As you can see it is not a perfect circle, but it must be a slimmed down shape and end in a slightly pointed shape. This tip will be the mouth of the character, so you can navigate with the drawing. At the top it will be a circle, but the bottom stretches until it ends at the top which means the mouth.
Step 2
We continue to implement our basic forms. After doing the head, the following will be the basis of the body. It is a kind of folding air bag. Leave the final posture as if sitting, because if we start winding with the image of the spiderman, the end result will not be as we expected.
Step 3
This step is when you will begin to understand ways that at first glance seem a little amorphous and very ugly. In this step, we will place the limbs, even in an original outline form. As you can see at the bottom are the legs bent and separated from each other. At the top, you can see that the arm is open, but not the same height, but one arm is taller than the other. I give you an information that is right for you for any character drawings: try never to be symmetrical because this makes a boring drawing. Symmetric means that the position of the right is exactly the same as the left. For example, if you look at the drawings you find of Mickey Mouse, it’s never in a symmetrical position, and remember that Disney, are the masters we all need to look at.
Step 4
Gradually our drawings began to become more interesting, because we began to see the shape of spiderman. In this step we will start to make the details. On the left hand is the most complicated thing: putting his fingers in the typical spider-man position when he throws his web. On the other hand, we have a more relaxed posture and are therefore simpler. The third detail we are going to do in this step is the eye holes. You should also copy each stroke, since it is not a straight line or geometry, so you should give curvature sometimes to the side and sometimes change. The lines you draw in this step are the outer part of the eye mask.
Step 5
We will give the rest of the details in this step. From what we had, we will now complete the lawsuit. In the eye mask, make sure that the inside stroke is not exactly the same as the outer one. In other words, they are not parallel lines, but each line follows a different line, so pay attention to each line. In drawing the body, take a close look at what the boundaries are because it is necessary to color our Spiderman paintings later.
Step 6
For spider web drawings, you must draw the vertical lines more or less, while the horizontal lines are small arcs that go from this line to the vertical line that we drew first. Remember that everything that carries the spider web line will be what will later be painted red.
Step 7
Another detail we see in this step is the spider carrying the spider in the chest. It is a fairly simple drawing to make. It is an elongated eight type, with a bottom.
Step 8
Complete the last details and you’ve got a superhero spiderman like that.


