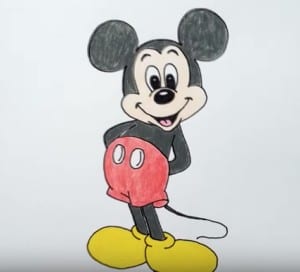
How to draw Mickey mouse from Mickey mouse step by step easy with this how-to video and step-by-step drawing instructions. How to draw cartoons characters step by step for children and everyone.

Please see the drawing tutorial in the video below
You can refer to the simple step-by-step drawing guide below
Step 1
Draw a circle in the middle of the paper. Leave enough space for Mickey’s body below and ears above the circle.
Step 2
Draw two equal circles for the ear. Add two curves on Mickey’s face.
Step 3
Draw another circle below the head. Add two curves intersecting with it.
Step 4
Draw two lines for the legs and two ovals for the foot. Draw two circles for socks.
Step 5
Add two lines for the arm and the oval for the hand. Outline palm, thumb and finger. This step may take several tries, so be prepared with your eraser. You can also see how to draw Mickey Mouse video. Remove excess lines from your hands.
Step 6
We will identify the next leg and arm. Draw two curves on both sides of each line we draw for legs and arms. A silhouette of Mickey Mouse is beginning to form. Add two ovals to the buttons of the shorts.
Step 7
Remove one of the crossings from the body. Draw the legs of the shorts. Wipe the bottom of the circle to create the body.
Step 8
Draw curves for chin and cheeks. Outline two arches for eyebrows. Draw the mouth and tongue. Remove excess lines from the face. Draw the eyes and nose. Your head and head Mickey Mouse is now complete.
Step 9
Add two curves for each bracelet. It’s funny how so many classic Disney characters wear gloves!
Step 10
Draw a curve for the tail.
Step 11
Color your Mickey Mouse. How do you like it? If you like drawing tutorials, leave a comment below.


